Sequencer
- Frank Chan (Unlicensed)
This module provides a means for taking a playlist (or sequence) of playlist items to air using an active CG Player.
To access the page, select Miscellaneous > CG from the Home page.
Sequencer
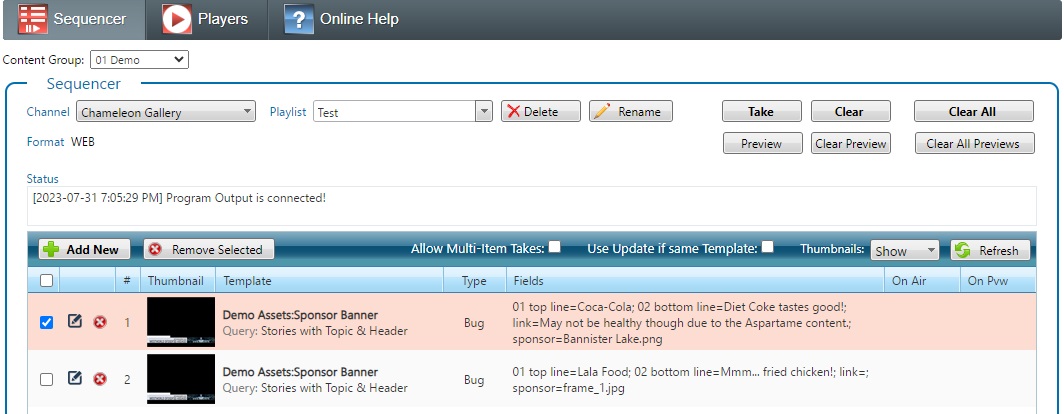
The Sequencer page works with both Web and XPression templates (scenes). For Web templates, make sure the Player Channel connection information is specified for a Chameleon Web Server and if for XPression templates, the Player Channel connection information must be specified for a Chameleon Ticker Player for XPression.
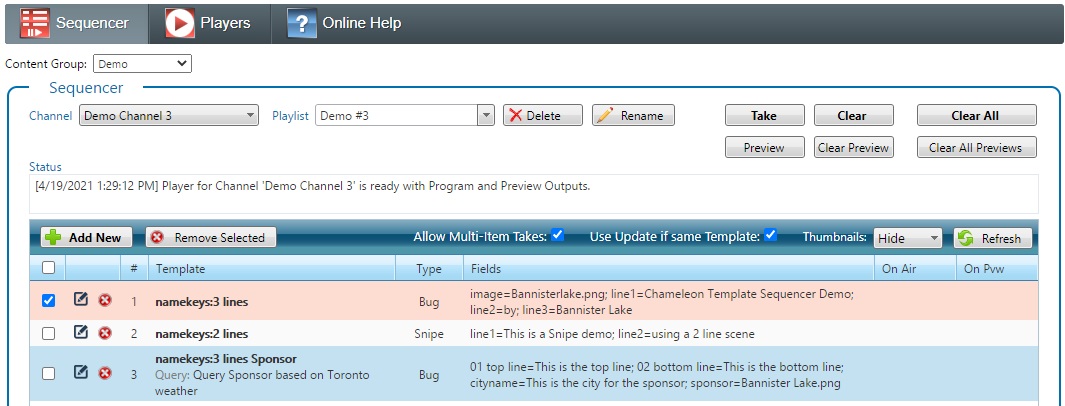
The Sequencer requires a playlist which houses playlist items that can be taken to air on the selected Channel. Each playlist item specifies a Template, the values assigned to the explicit fields (if any) and also whether the item should be taken to air as a Snipe (if the Template has a timeline, it will be cleared from air when the timeline is complete) or a Bug (stays showing until manually taken off air).
Selecting a Channel
- Select a Player Channel from the 'Channel' drop-down list.
- The 'Playlist' drop-down list will be populated with available Playlists (if any).
- Flow will also try to connect to the Player Channel.
- If unsuccessful, you will see a button appear for re-connecting to the program output. If preview output is defined for the channel, a button for re-connecting to the preview output will also appear. A status message will also be shown indicating that connection is unsuccessful. Check on the Ticker Player associated with the IP address and ports associated with the Player Channel. If the Ticker Player is running or has been restarted, press the Re-connect buttons to try connecting again.

Selecting/Creating a Playlist
- Select a Playlist from the 'Playlist' drop-down list.
- If there are no Playlists available (i.e., only '<None>' is shown in the list), create one by typing in a name for the new Playlist. Then press the ENTER key to create the Playlist.
- Once a Playlist is selected (or created), a number of things happen:
- the 'Clear All' button becomes enabled
- also the grid will appear showing the playlist items that are members of the playlist (if any).
Creating a Playlist Item
- Click on the 'Add New' button to bring up the Item Editor which will allow you to enter the information needed to create a new playlist item.
- Select a Template to use from the 'Template' drop-down list.
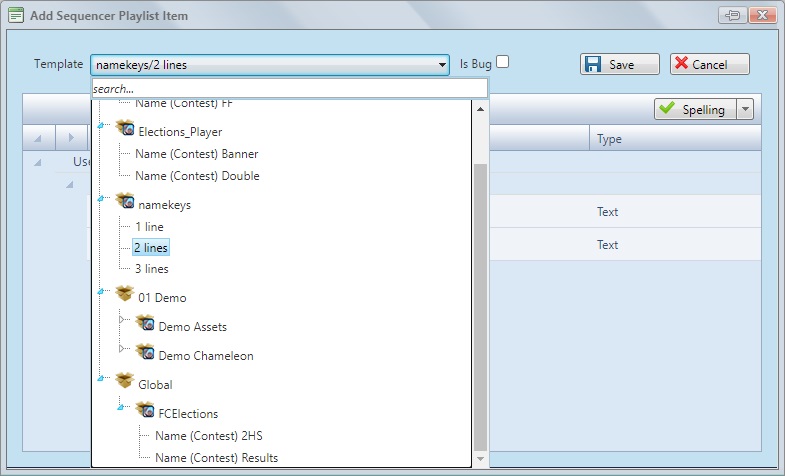
- The Templates are displayed in a hierarchical form and are ordered by Content Group, then by Project and then finally by the Template itself.
- The Project items first listed at the top belong to the Content Group that is selected in the Sequencer page and are not placed under a Content Group item. In this example, we have the 'namekeys' project which belong to the 'Demo' content group.
- Content Group items when selected expand or collapse their branches and sport the following icon:

- Project items when selected expand or collapse their branches and have the following icon:

- Template items have no icons associated and are selectable.
- If the list of items is too long, the user can type in a partial name in the 'Search' textbox to filter down the list of templates.
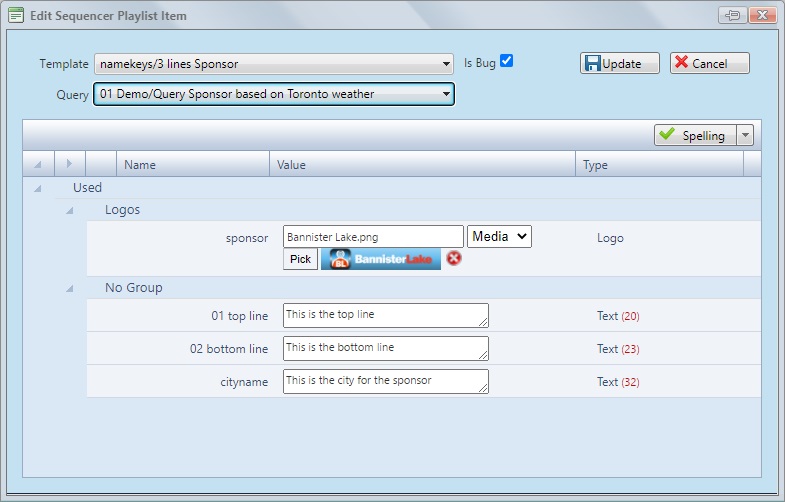
- By default, the item will be taken to air as a Snipe. To change this item to play out as a Bug, check the 'Is Bug' checkbox.
- If there are any explicit fields associated with the Template, these will show in the grid allowing you to fill in the field values to use with the item.
- The user can also select a Query to use with the Template. Using a Query is optional.
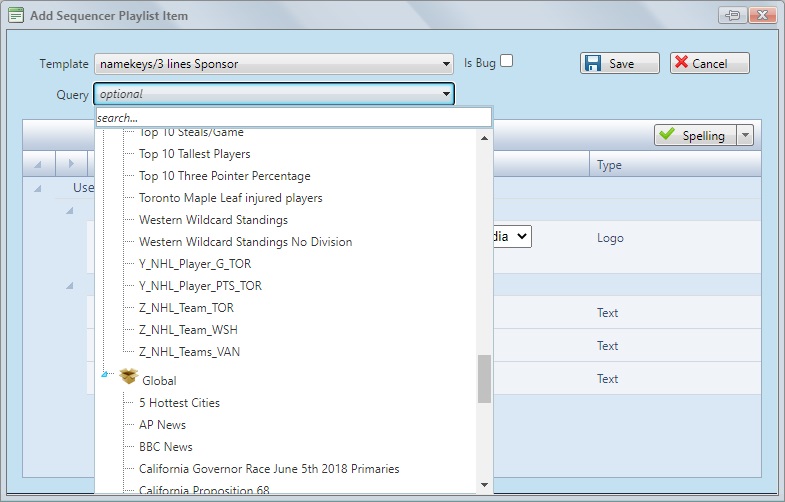
- Just like the in the 'Template' drop-down list, the 'Query' drop-down list will display its contents in a hierarchical form:
- Content Groups are shown with the name of the Content Group as well as a box icon. Content Groups when selected expand or collapse their branches.
- Queries are shown without any icons and can be selected.
- Content Groups are shown with the name of the Content Group as well as a box icon.
- If a Query is selected for the item, any data generated for fields in the Query will be used to fill in matching fields of the Template prior to being taken to air.
- Note that if a query result field is also an explicit field, the data in the query will override the data that is entered in the Explicit Fields grid.
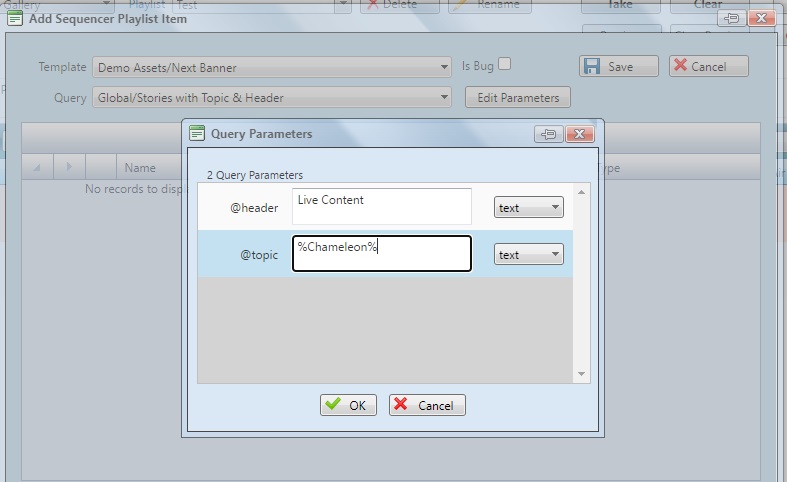
- If a Query uses @ parameters, the 'Edit Parameters' will be visible and on clicking will bring up the 'Query Parameters' dialog. This dialog will allow the values (and value types) of the @ parameters to be set.
- Click on the 'Save' button to create the playlist item.
Editing a Playlist Item
- Select the item from the grid that you wish to edit.
- Click on the Edit icon that is associated with the item.

- The Item Editor (similar to the one used for creating a playlist item) will show up allowing you to modify all the settings.
- Click on the 'Update' button to save any changes made to the item.
Deleting Playlist Items
- To delete a single playlist item, click on the Delete icon that is associated with the item.

- To delete multiple playlist items, select all the items you wish to delete by clicking on the individual item's selection checkbox. Alternatively, hold the CTRL key down and click on the items.
- Click on the 'Remove Selected' button.

- A dialog will show up indicating the number of items that you wish to delete. Click on the 'OK' button to proceed with the item deletions.
Taking Playlist Item to Air
- Select a Playlist Item in the grid by clicking anywhere in the item.
- Click on the 'Take' button. If this succeeded, there will be an icon in the 'On Air' column indicating that the item has been taken to air.

- If the 'Allow Multi-Item Takes' option is checked for the Playlist, you can have more than 1 item on air simultaneously. You can even do this at the same time by selecting multiple items by clicking on the individual item's selection checkbox or hold the CTRL key down while selecting all the desired items. Once you have selected all the items, click on the 'Take' button. If this action succeeds, the 'On Air' icons will appear for the selected items.
- If the 'Allow Multi-Item Takes' option is unchecked, it means that only 1 item can be on air at a time. So, if there is an item that is currently on air and you press the 'Take' button for a different item, the current item is set Offline (doing it's Out animation, if any) and at the same time the new item is set Online (doing it's In animation, if any).
- If the 'Use Update if same Template' option is checked, this means that when you have an item currently on air and you press the 'Take' button for a different item, and if both these items use the same Template, the Update function will be called for the new item instead of setting it Online (i.e., will use the Update animation, instead of the In animation). This happens irrespective of whether the 'Allow Multi-Item Takes' option is checked or not.
- The status resulting from the take will be shown in the 'Status' message box. If doing multiple item takes, only the status for the last item in the selections will be shown.
You can have more than one Sequencer running at the same time by using different tabs (or windows) on a Web Browser where each of the Sequencers can be using the same or different channel. If using the same channel, it would be prudent to use different playlists to avoid confusion.
Note that if the Sequencers are using the same channel but different playlists, and if some or all of the playlists have the 'Allow Multi-Takes' option checked, you may see a discrepancy for the On Air counts in the Status strip (at the bottom right side of the grid) where the count of items on air in the channel is more than that for the playlist (indicating that another Sequencer has items on air).

If you are on a Sequencer with the playlist not having the 'Allow Multi-Takes' option checked and you take an item to air, this will result in any items playing on the other Sequencers to be taken off air (if they are using the same channel).
If an Output (Program or Preview) IP address and port is defined for the selected Channel (CG Player) but doesn't exist because there isn't a Chameleon Web Player instance with matching port values in the API (or the API is not enabled), the performance of the CG Sequencer that uses this Channel can be severely degraded.
Clearing Playlist Item from Air
There are 2 ways to clear a Playlist Item:
Method 1 - Select the item(s) and click on the 'Clear' button:
- Select a Playlist Item in the grid by clicking anywhere in the item.
- Click on the 'Clear' button. If this succeeded, the 'On Air' icon will be removed.
- If the 'Allow Multi-Item Takes' option is checked for the Playlist, you can clear more than 1 item at the same time. To do this, select all the items you wish to clear by checking the individual item's selection checkbox or by holding down the CTRL key and clicking on the desired items. Once you have selected all the items you want cleared, click on the 'Clear' button. If this action succeeds, the 'On Air' icons for the selected items will be removed.
- The status resulting from the clear will be shown in the 'Status' message box. If doing multiple item clears, only the status for the last item in the selections will be shown.
Method 2 - Click on the 'On-Air' icon of the Playlist Item. This method requires Chameleon build 13.3.4.5 or later.
Clearing all Channel Content from Air
- Select the Player Channel from the 'Channel' drop-down list that you wish to have its output cleared.
- Click on the 'Clear All' button. If this action succeeds, all 'On Air' icons will be removed for the items of the playlist.
- The status resulting from the clear all action will be shown in the 'Status' message box.
Previewing Playlist Items
If the selected CG Player supports previewing of items, an extra row of buttons will show up below the 'Take' and 'Clear' buttons. In terms of function, the 'Preview', 'Clear Preview' and 'Clear All Previews' work exactly like that of the 'Take', 'Clear' and 'Clear All' buttons except for affecting the Preview output of the Player Channel instead of the Program output.