Installing Internet Information Services Components
- Chris Mintz (Unlicensed)
- Jonathan Schmale
- Georg Hentsch (Unlicensed)
Configuring Windows Features and Adding Internet Information Services (IIS)
The following article covers setup for Windows Server 2008/2012/2016, Windows 7 & 10.
Web server features will need to be enabled on your server
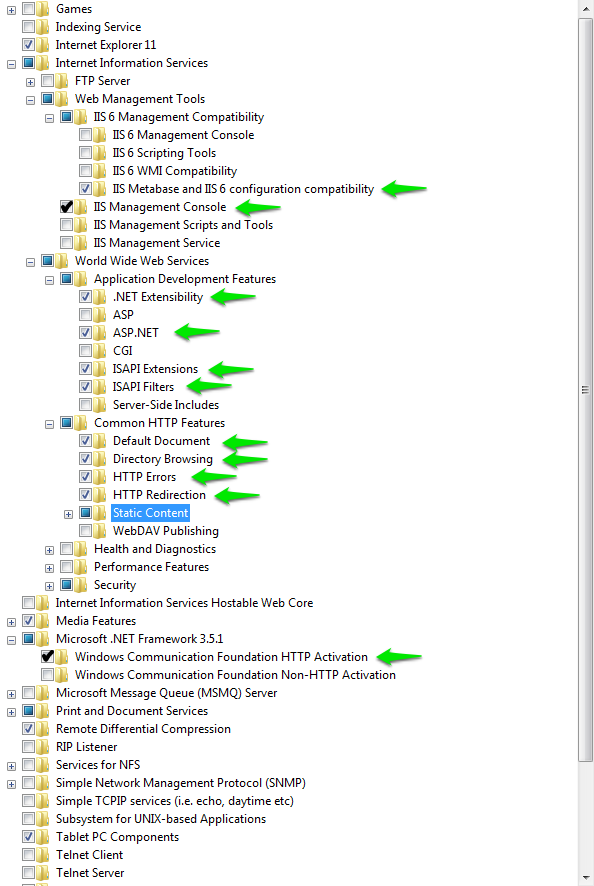
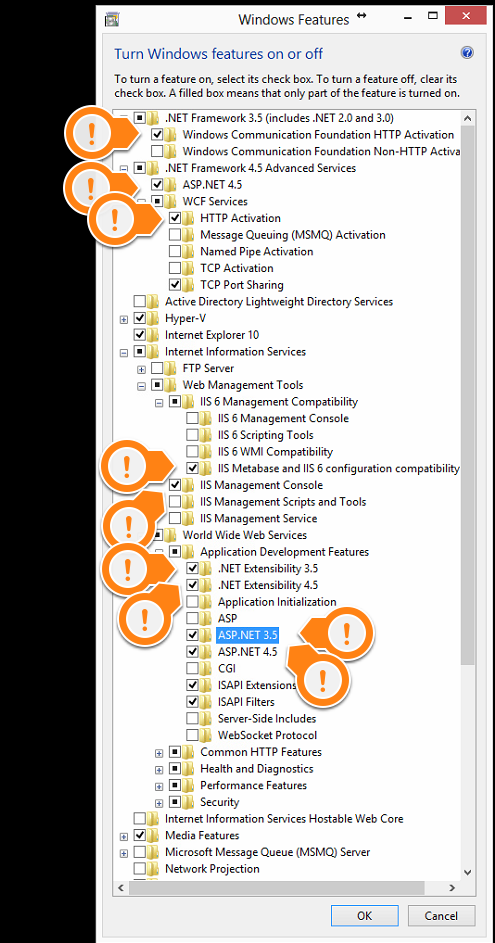
Step 1 & 2 - WINDOWS 7/10 - Open Control Panel and open Programs Features. Click on Turn Windows Features On or Off


- Web Management Tools
- IIS 6 Management Compatibiltiy
- IIS Metabase and IIS 6 configuration compatibility
- IIS Management Console
- IIS 6 Management Compatibiltiy
- World Wide Web Services
- Application Development Features
- .NET Extensibility
- ASP.NET
- ISAPI Extensions
- ISAPI Filters
- Common HTTP Features
- Default Document
- Directory Browsing
- HTTP Errors
- HTTP Redirection
- Static Content
- Performance
- Static Content Compression
- Dynamic Content Compression
- Application Development Features
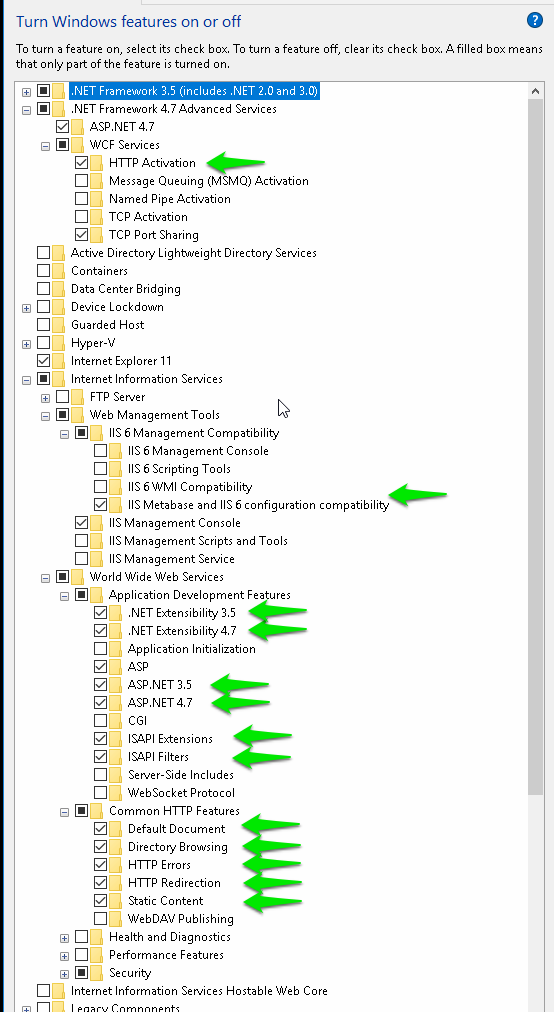
Microsoft .NET Framework 3.5.1:
- Windows Communication Foundation HTTP Activation
- WCF Services
- HTTP Activation
- Web Management Tools
- IIS 6 Management Compatibiltiy
- IIS Metabase and IIS 6 configuration compatibility
- IIS Management Console
- IIS 6 Management Compatibiltiy
- World Wide Web Services
- Application Development Features
- .NET Extensibility 3.5
- .NET Extensibility 4.7
- ASP.NET 3.5
- ASP.NET 4.7
- ISAPI Extensions
- ISAPI Filters
- Common HTTP Features
- Default Document
- Directory Browsing
- HTTP Errors
- HTTP Redirection
- Static Content
- Performance
- Static Content Compression
- Dynamic Content Compression
- Application Development Features
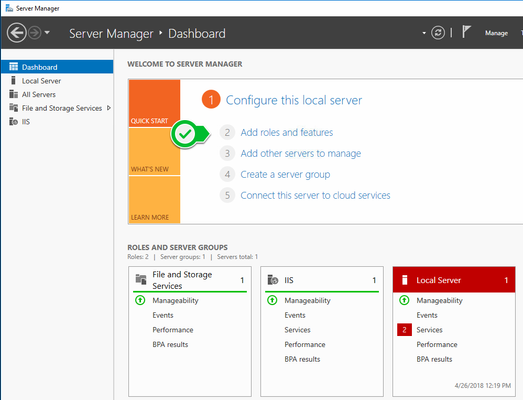
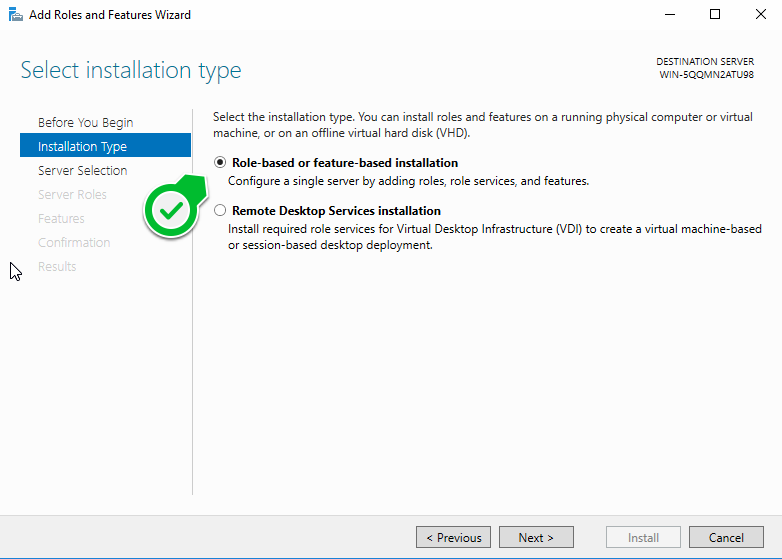
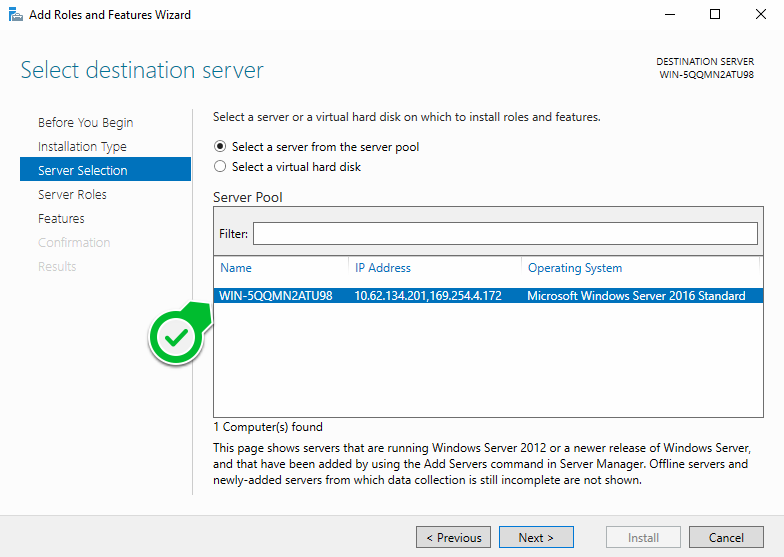
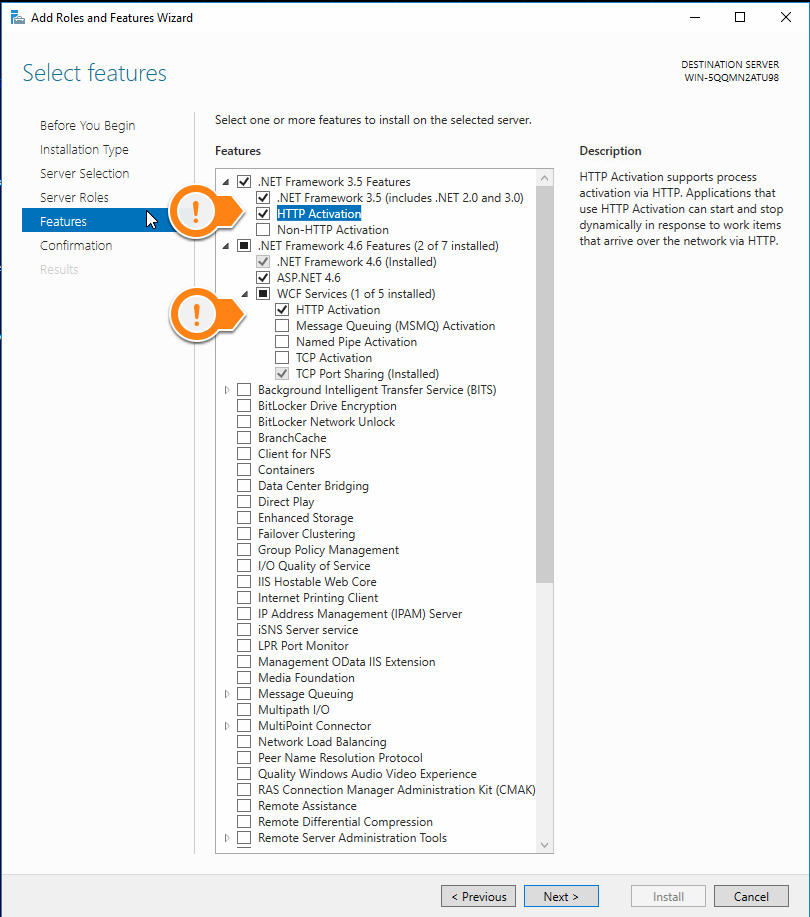
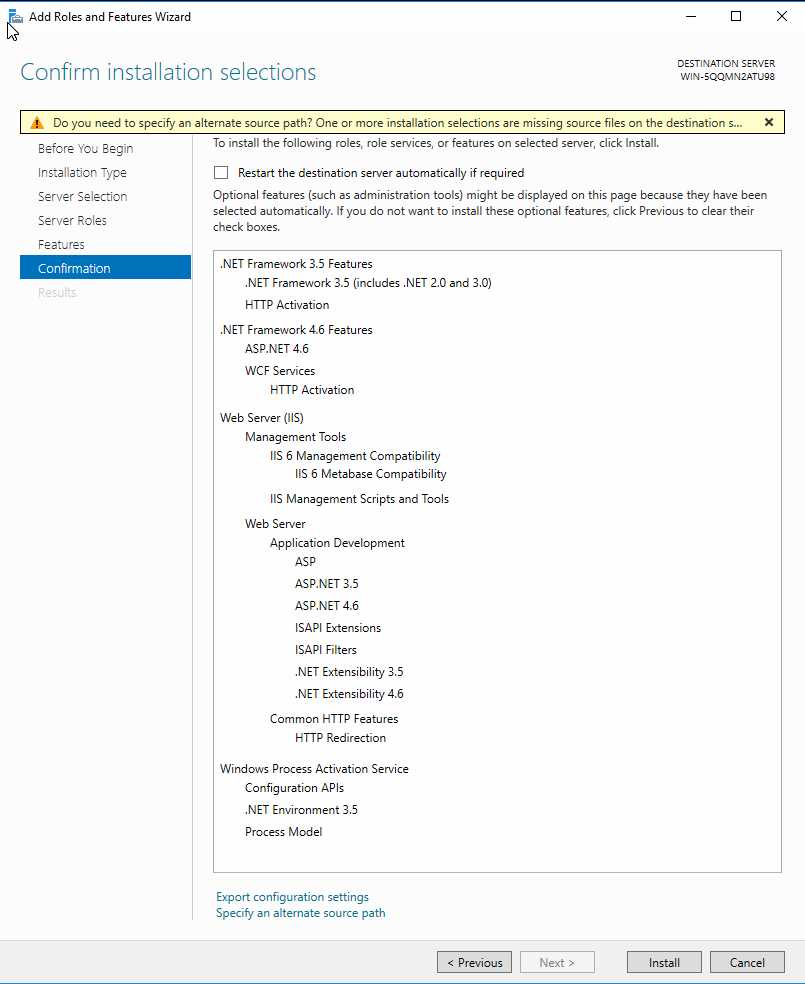
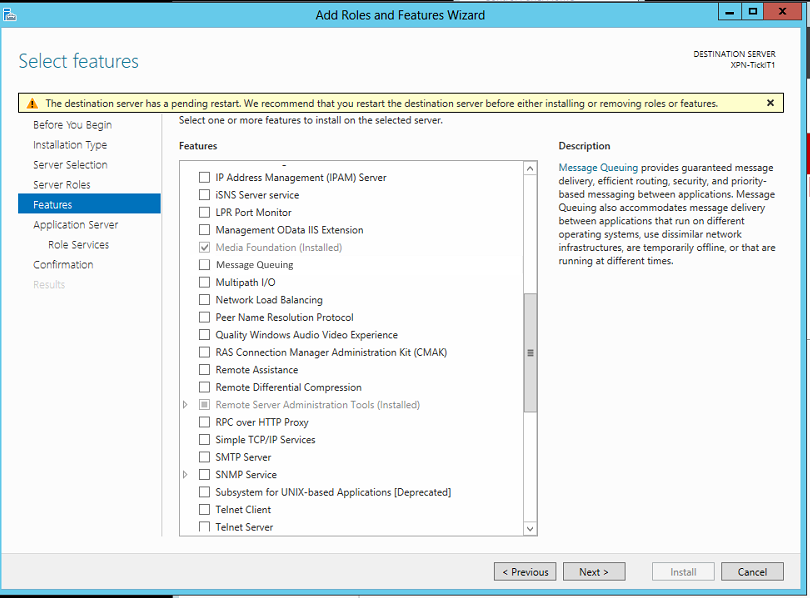
Step 1 & 2 - WINDOWS SERVER - Open Server Manager. Click on Local Server.
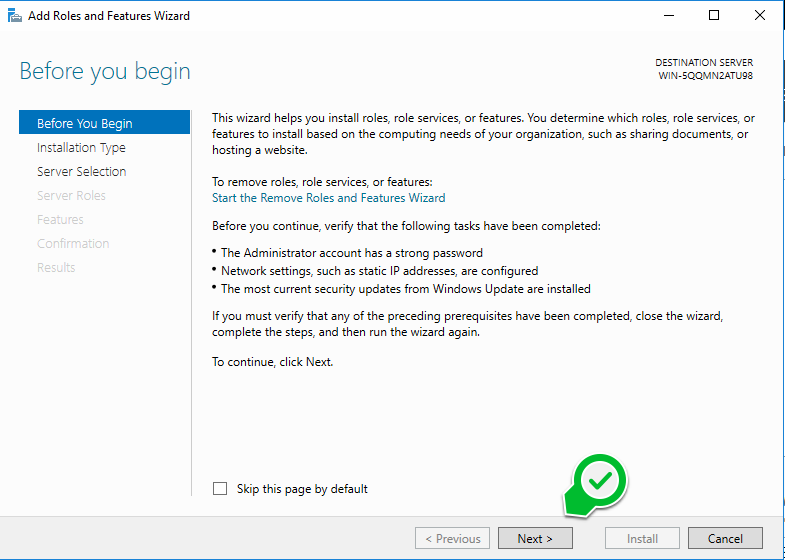
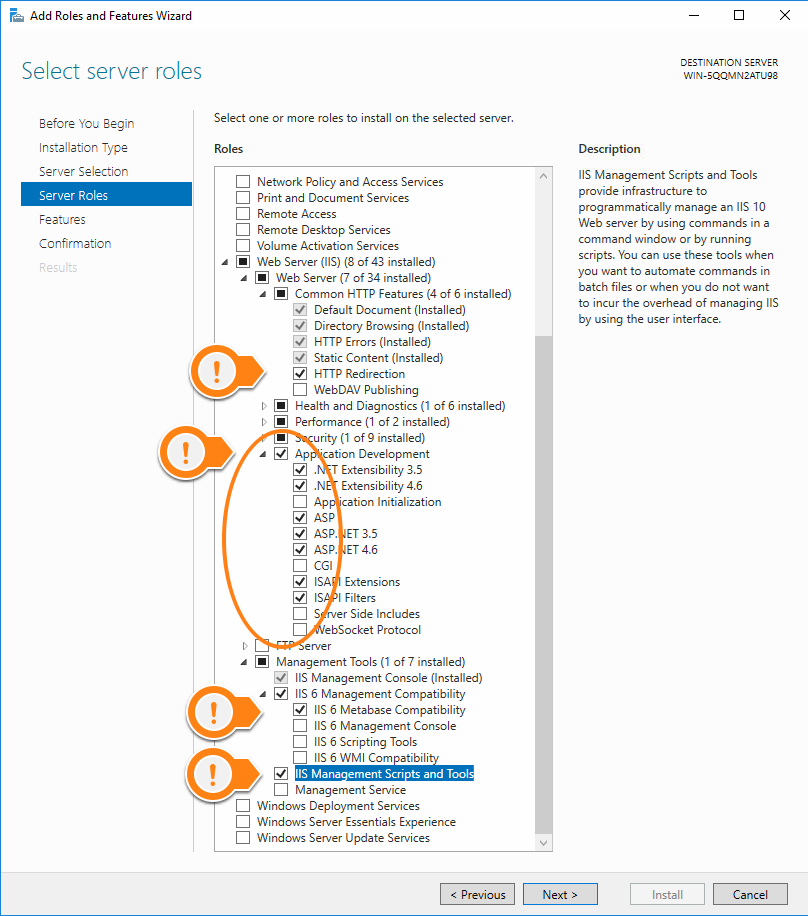
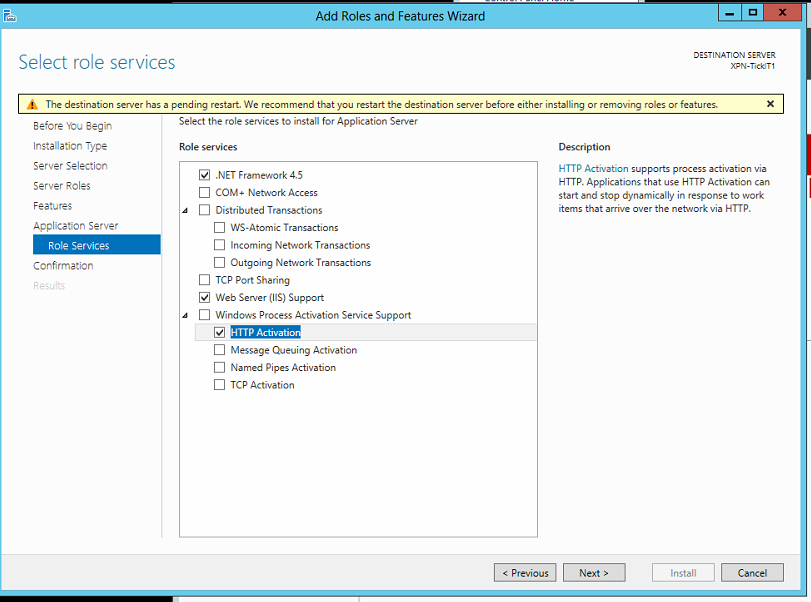
Step 3 - Ensure the following marked options are enabled or Roles and Features are enabled
- NET Framework 4.5
- Web Server IIS Support
- Management Tools
- IIS 6 Management Compatibility
- IIS 6 Metabase Compatibility
- Performance
- Static Content Compression
- Dynamic Content Compression
- Http Activation
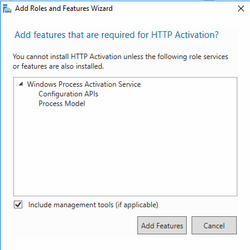
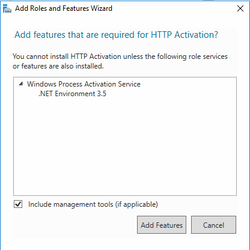
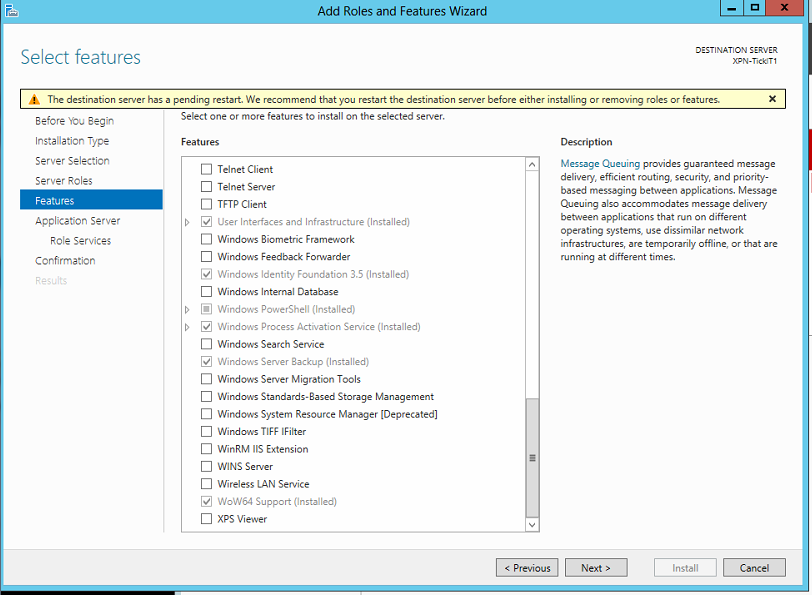
As you select features confirmation dialogs will pop up confirming the components this feature requires. You can accept them all, expand the link below if you would like to see them.
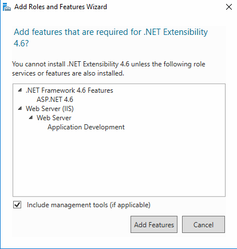
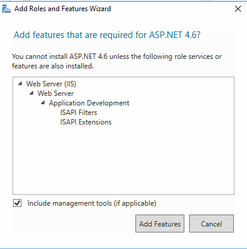

As you select features confirmation dialogs will pop up confirming the components this feature requires. You can accept them all, expand the link below if you would like to see them.
- NET Framework 4.5
- Web Server IIS Support
- Management Tools
- IIS 6 Management Compatibility
- IIS 6 Metabase Compatibility
- Web Server
- Performance
- Static Content Compression
- Dynamic Content Compression
- Performance
- Http Activation
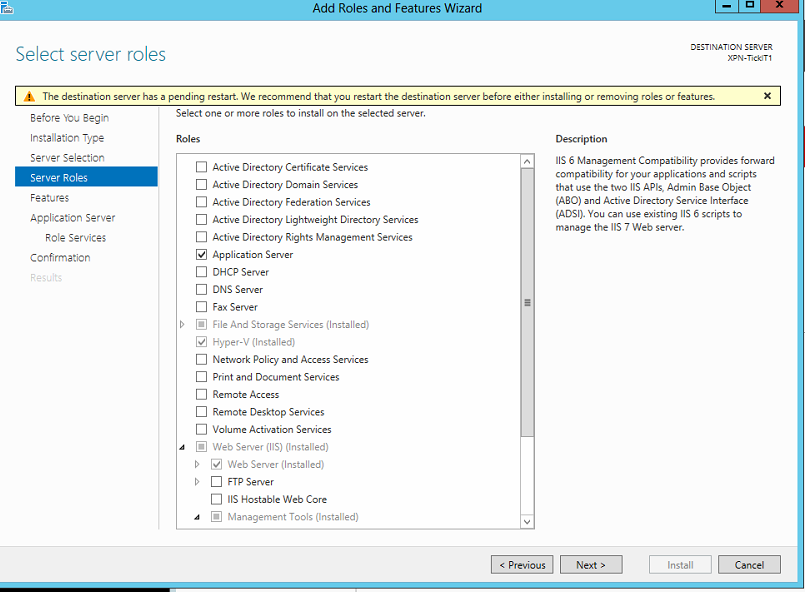
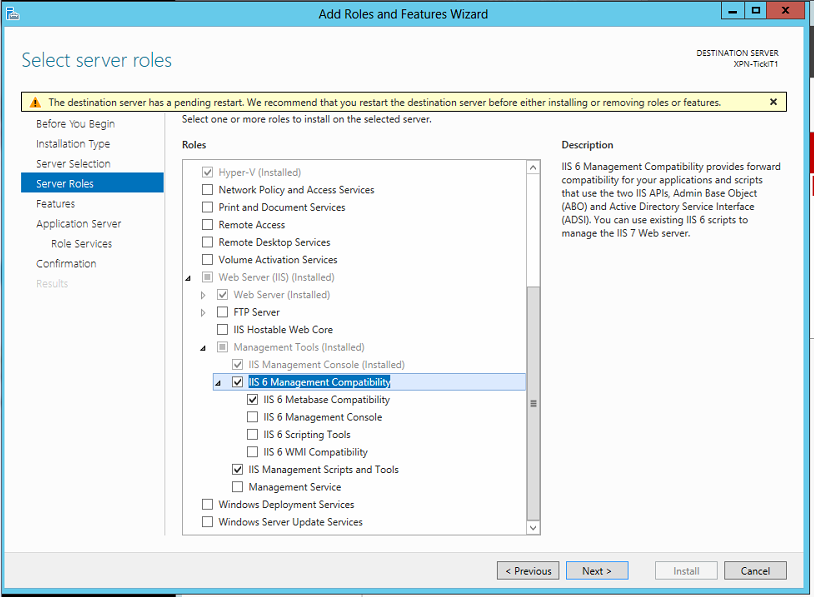
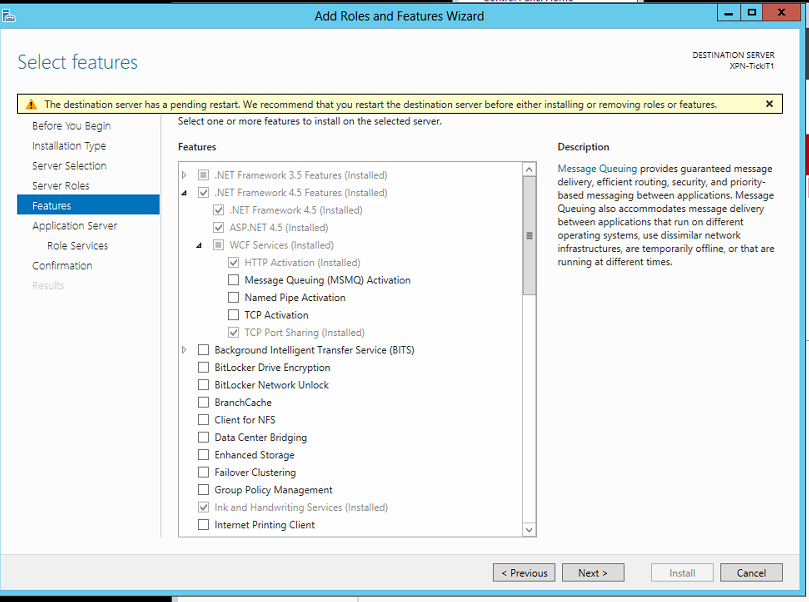
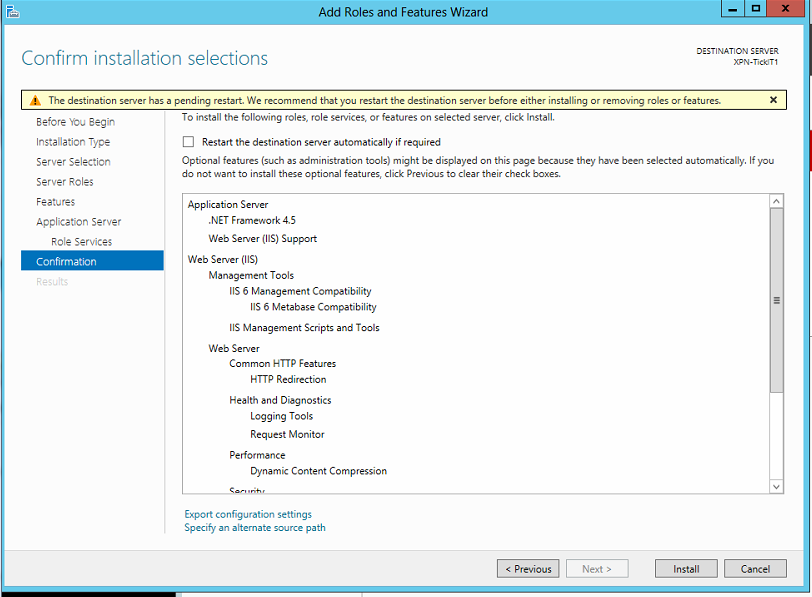
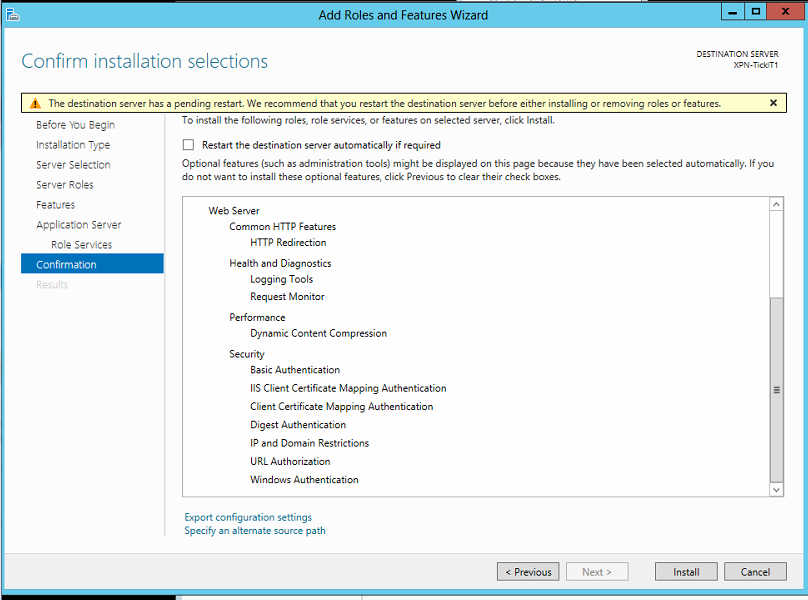
Step 4 - Click OK
Configuring IIS
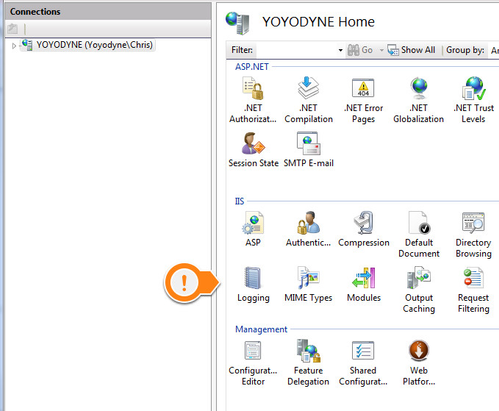
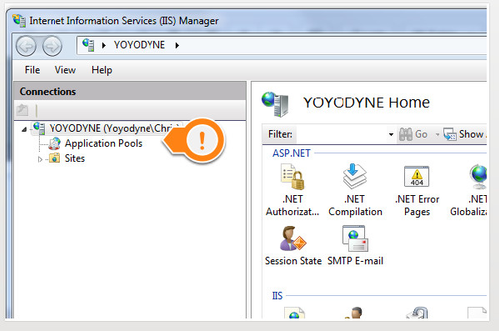
Step 1 - In the Control Panel, open the Administrative Tools
Step 2 - Open the IIS Management Control
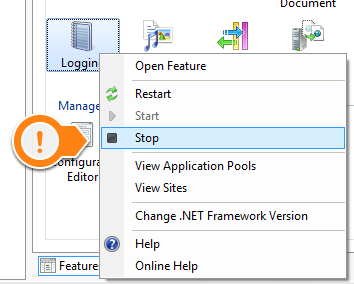
Step 3 - Click on the top node
Step 4 - Right click on logging for IIS
Step 5 - Disable this as it is not needed for internal systems.
Step 6 - Expand the top node
Step 7 - Click on the Application Pools node
Step 8 - Find the DefaultAppPool

Step 9 - Double click on this and set the .NET Framework to v4.0.xxxxx
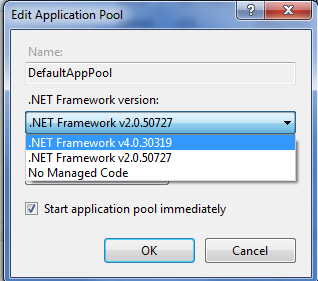
Step 10 - Click [OK]
Note
If you have more than 1 product installed on the same system (ie. Brando, Super Ticker, Chameleon, etc.), it is a good idea to create an Application Pool for each application.
Step 11 - Configure App Pool Recycling
The default setting is to to auto recycle every 29 hours to give the appearance of being somewhat random.
You can select a specific time of time instead.

You can enter a specific time and disable the regular intervals option as desired/appropriate:

Your IIS is now configured and you are ready to continue with installation of your product.
Step 12
You may also need to enable/start the World Wide Web Publishing service on the server before the site will be accessible.
