Programs
Use the Programs data module to manage a variety of programs including TV shows, movies and more. Programs can be manually entered or imported using compatible readers such as our TVDB Reader for television shows and OMDb Reader for movies.
You can create and manage your program data in Flow. From the Home page, select Branding > Programs.
The list of available programs displays some of the fundamental fields.
Add or Edit a Program
To add a new program press the Add New Program button and a blank form will open.
To edit a program press the edit icon to the left of the program name or double-click on the row and the filled in form will appear.
| Form Fields | Comments |
|---|---|
| |
Duration in minutes. Ratings are created in the Program Ratings module. Marking a program as a series allows you to edit its episodes in the Episodes module. | |
The short name. Used to display in compact layouts. | |
This is the description of the content in the show.
Note that individual episodes also have their own synopsis. | |
The website address of the program. | |
The date that the program was first broadcast. Note that individual episodes also have their own first aired date. | |
An optional hashtag to be associated with the program. | |
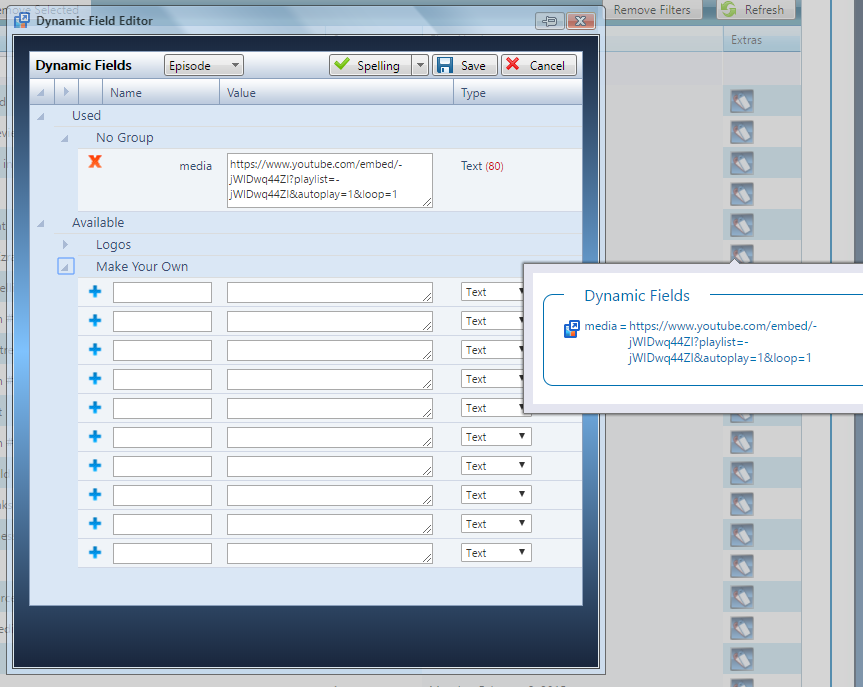
Click on the icon to open the Dynamic Field Editor to add even more custom data. |
Remove a Program
There are a couple ways to remove programs you no longer want.
Remove an Individual Program
Locate the program you want to remove and press the remove icon to the left of the program name.
You will be prompted to confirm that you want to remove the selected program.
Remove Multiple Programs at Once
Select each of the programs that are to be removed by clicking the checkbox in the first column so that it display a checkbox. Once you have selected all the programs you want to remove press the Remove Selected button in the header of the program list.
System Preferences
Default Duration
Determines the default length of time of a program in minutes. If you find yourself entering more hour long shows, set this to 60 instead of the shipped default of 30.
Embedding a live/video URL
You can add a url as a source for your videos. To do this, you need to add the following urls in a embedded object in your scene with the same scene tag name.
In the below sample, the tag used for the embedded object was ^now.episode.media
YouTube:
For YouTube, in the Story->Image section use the URL tab and enter something like:
https://www.youtube.com/embed/yYc2Fnjew8A?autoplay=1
This format is good for LIVE or continuous streaming events that do not have a duration or length. They do not end.
For looping a single video, you need to convert it to a playlist using the following format:
https://www.youtube.com/embed/yYc2Fnjew8A?playlist=yYc2Fnjew8A&autoplay=1&loop=1
replace "yYc2Fnjew8A" with your YouTube video code or ID.
For a YouTube Playlists use the following format with your video ID:
https://www.youtube.com/embed/videoseries?list=PLTQXV2-cm8mB8aFMu1ZBXUUd7GCk-X-XO&controls=0&autoplay=1&loop=1
Vimeo:
For Vimeo, support looks like this:
https://player.vimeo.com/video/141567420?autoplay=1&loop=1
WebM Support:
http://www.webestools.com/page/media/videoTag/BigBuckBunny.webm?type=video/webm
MP4 (Edge browswer only)
http://www.webestools.com/page/media/videoTag/BigBuckBunny.mp4?type=video/mp4
Embedding a Google Slide URL
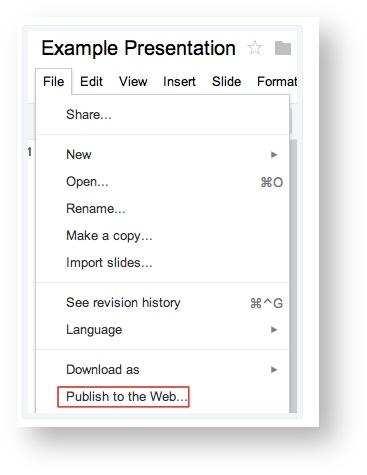
In your slide presentation select File - Publish to the Web
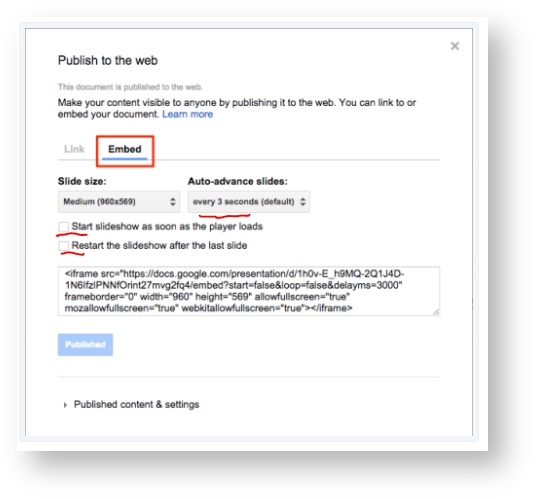
Select the Embed tab and check the following.
Out of the following: (XXXXXXXX represent your url code)
<iframe src="https://docs.google.com/presentation/d/e/XXXXXXXX/embed?start=true&loop=true&delayms=3000" frameborder="0" width="960" height="749" allowfullscreen="true" mozallowfullscreen="true" webkitallowfullscreen="true"></iframe>
Remove everything to make it look like this:
https://docs.google.com/presentation/d/e/XXXXXXXX/embed?start=true&loop=true&delayms=3000


