Compressing JSON Output from BLADE
Using Built-In Compression To Compress JSON/JSONP Output From BLADE
Reduce bandwidth consumption for performance improvement in a production environment by optimizing BLADE JSON output through environment enabled gzip.
The following guide will show you how to enable gzip compression for JSON through IIS's built in gzip library.
In a test of the same JSON content, the gzipped version of the result was reduced to only 10.5% of the original content size.
Content size without compression (analysis by Fiddler)
Content size with dynamic compression enabled in IIS
Enable Dynamic Compression in IIS
Enable dynamic compression in your returned dynamic pages with the following steps
- Open the IIS management console
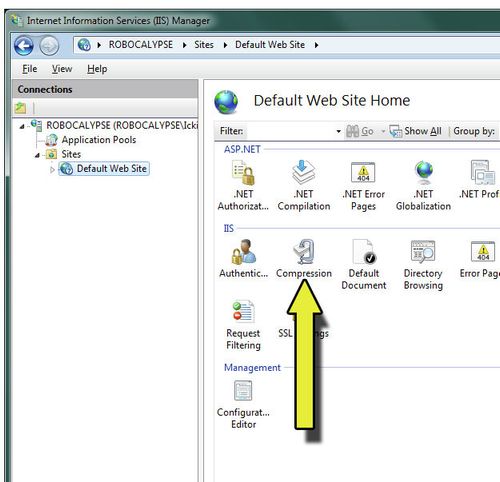
- Navigate to the Default website
- Click through on the Compression module
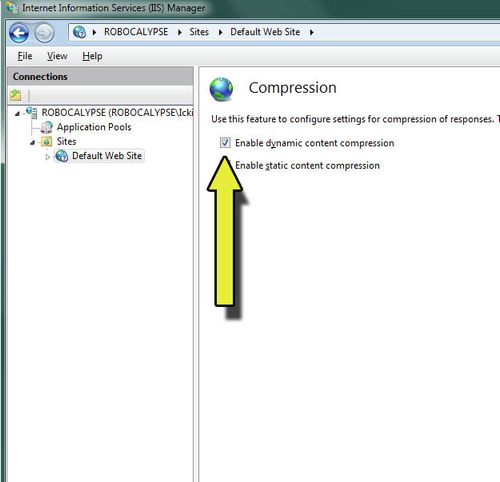
Enable compression of dynamic content.
If the message "The dynamic content compression module is not installed" appears in IIS when you try to enable it, please see the section below entitled, Installing Dynamic Content Compression
- Now open the ApplicationHost.config file located at %WinDir%\System32\inetsrv\config\applicationHost.config
Find the existing urlCompression node and make the following modification to it`s properties
<urlCompression doDynamicCompression="true" />
Still within the applicationHost.config, find the existing httpCompression node and within the dynamicTypes node add the following children nodes.
	        <add mimeType="application/json" enabled="true" />
	        <add mimeType="application/json; charset=utf-8" enabled="true" />
Your httpCompression node will look like this (extraneous entries removed)
<httpCompression>
	<staticTypes />
	<dynamicTypes>
		<add mimeType="application/json;" enabled="true" />
		<add mimeType="application/json; charset=utf-8;" enabled="true" />
	</dynamicTypes>
</httpCompression>
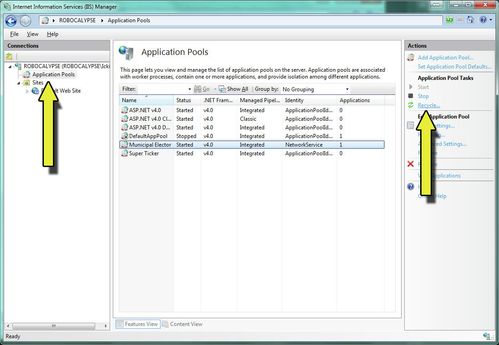
Be sure to restart the Application pool for the site you are testing to pick up the changes you have made to the host file
Installing Dynamic Content Compression
Win Server
If the message "The dynamic content compression module is not installed" appears in IIS when you try to enable it follow these instructions to install on Windows 7
- Open server manager
- Navigate to Roles > Web Server (IIS)
- Within Role Services open Add Role Services
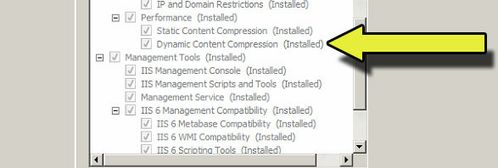
- Add the role Web Server > Performance > Dynamic Content Compression
Windows 7
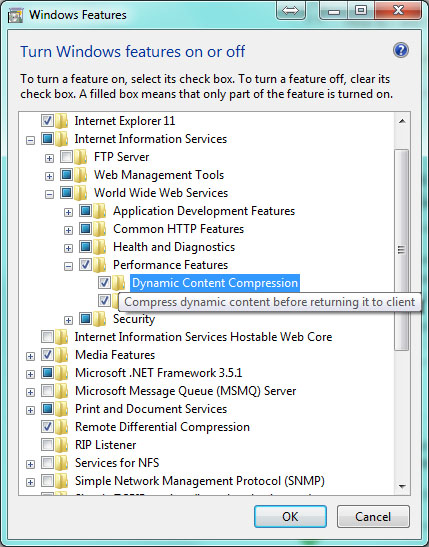
If the message "The dynamic content compression module is not installed" appears in IIS when you try to enable it follow these instructions to install on Windows 7
- Open Programs and Features
- Navigate to Internet Information Services > World Wide Web Services > Performance Features
- Enable Dynamic Content Compression


