Configuring Windows Features and Adding Internet Information Services (IIS)
The following article covers setup for Windows Server 2008/2012/2016, Windows 7 & 10.
Web server features will need to be enabled on your server
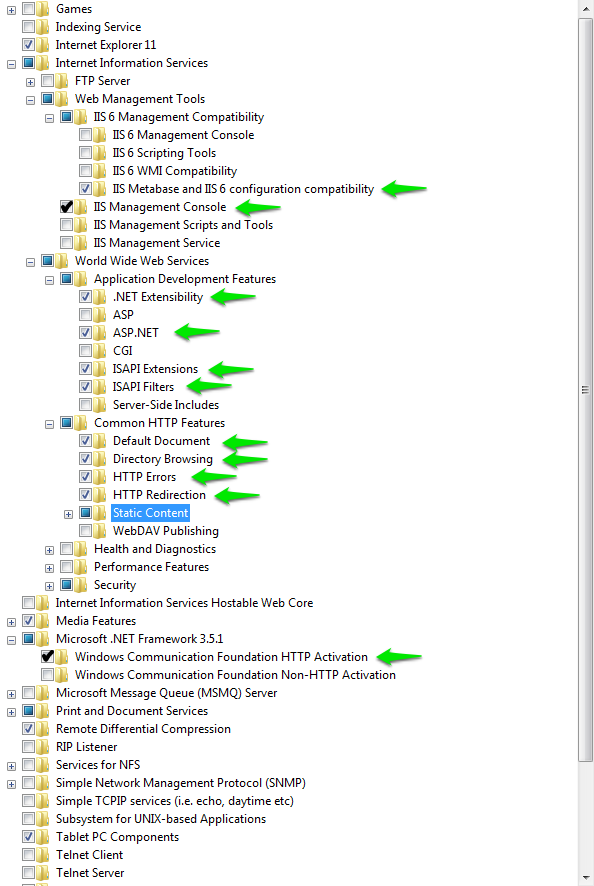
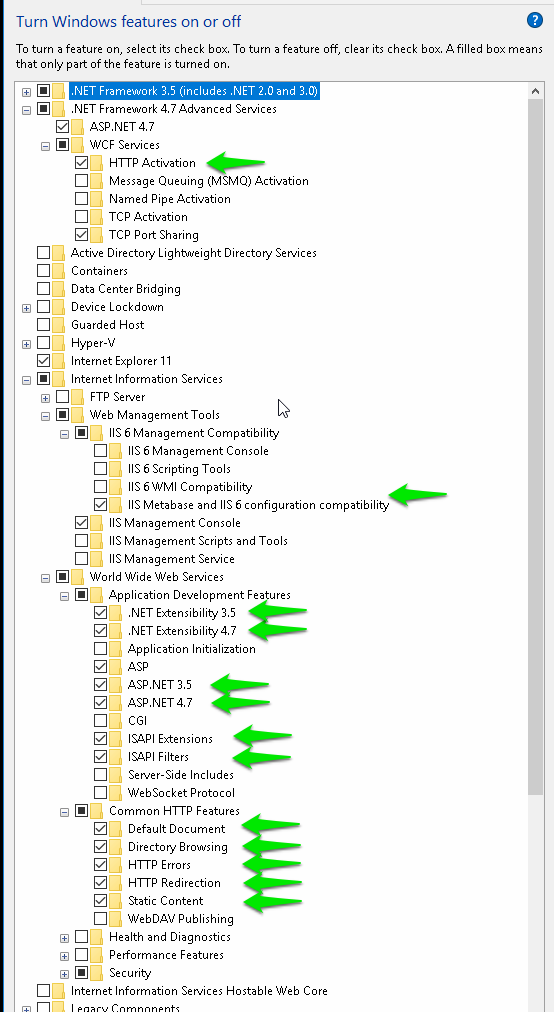
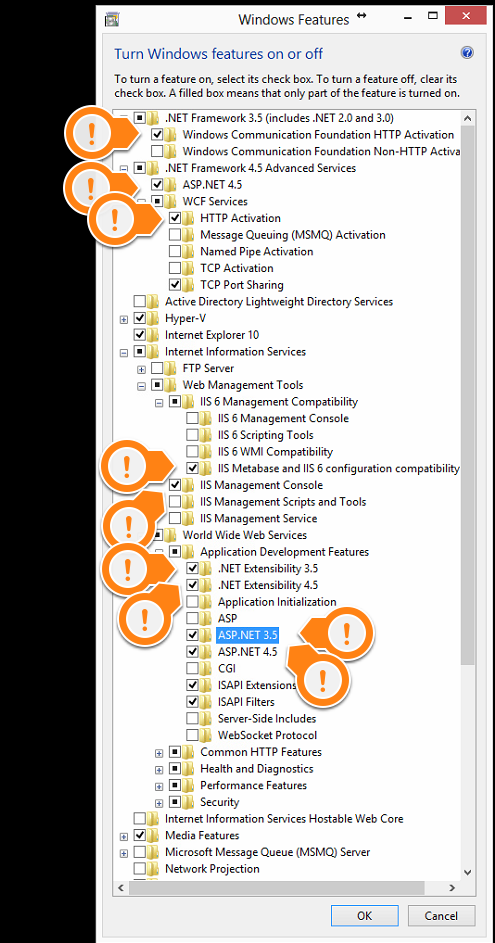
Step 1 & 2 - WINDOWS 7/10 - Open Control Panel and open Programs Features. Click on Turn Windows Features On or Off
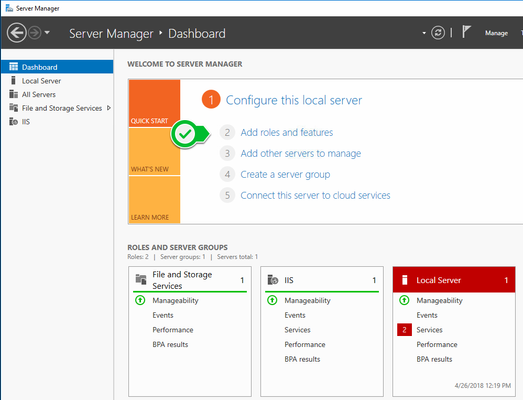
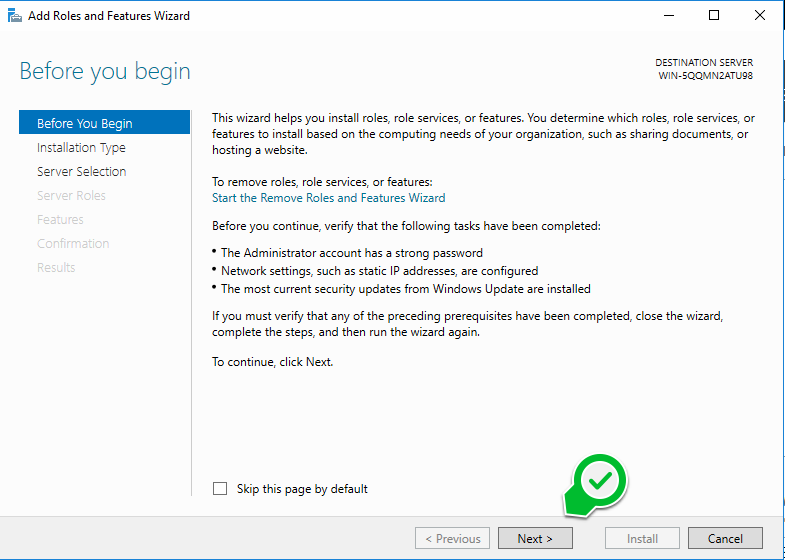
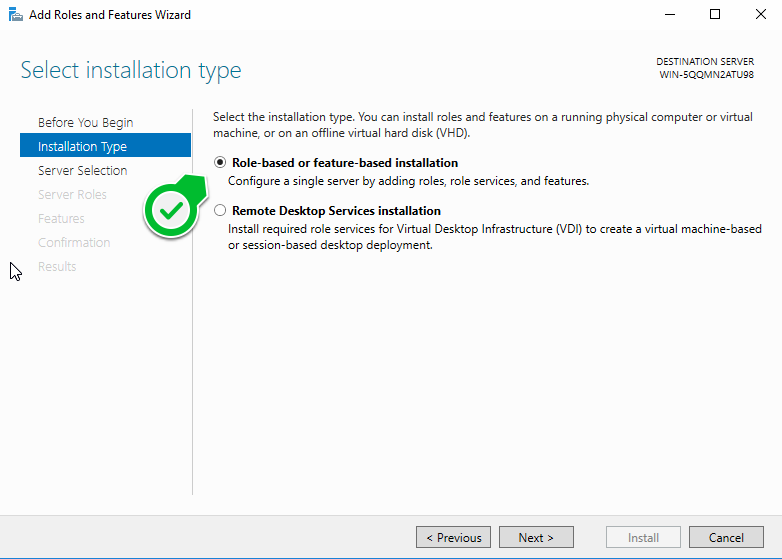
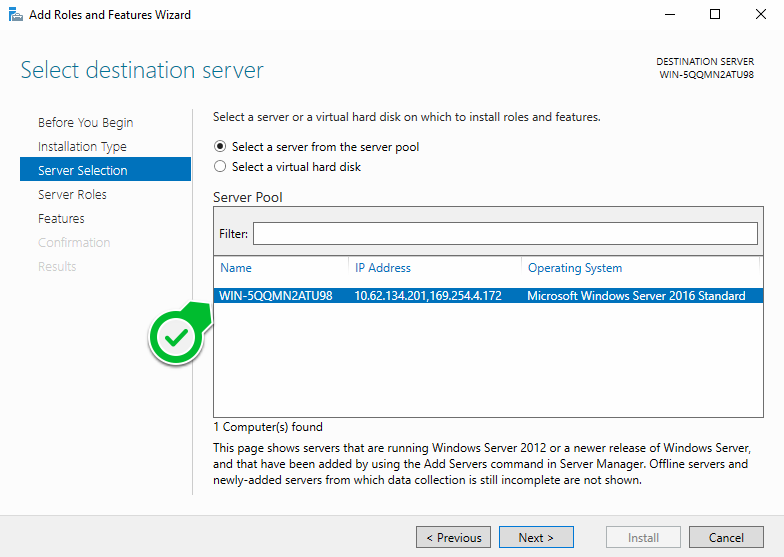
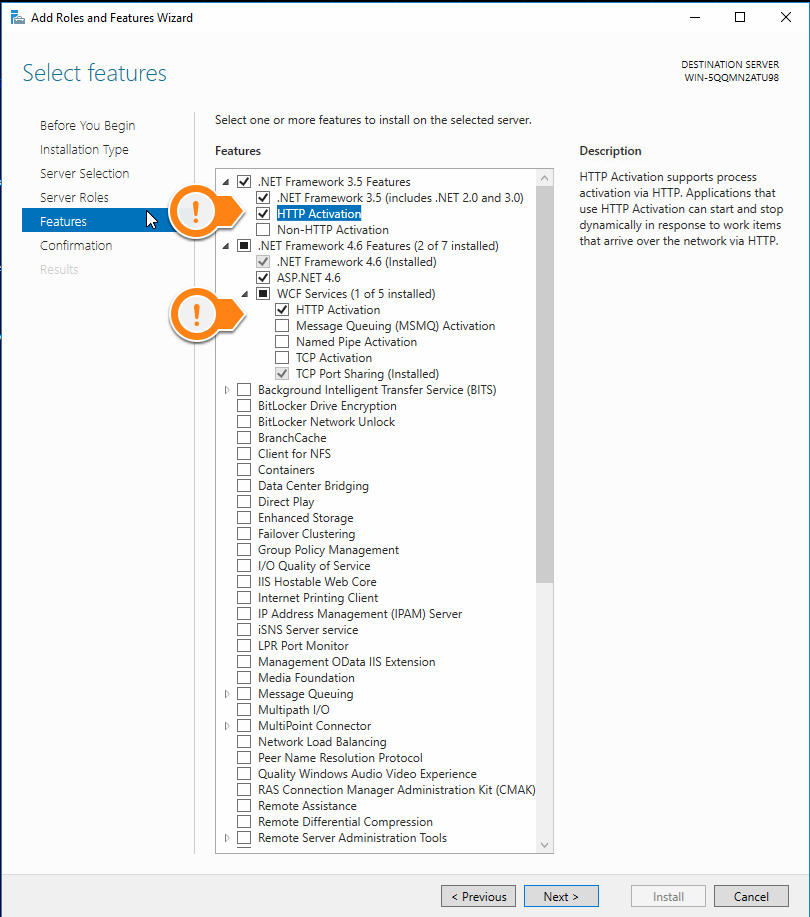
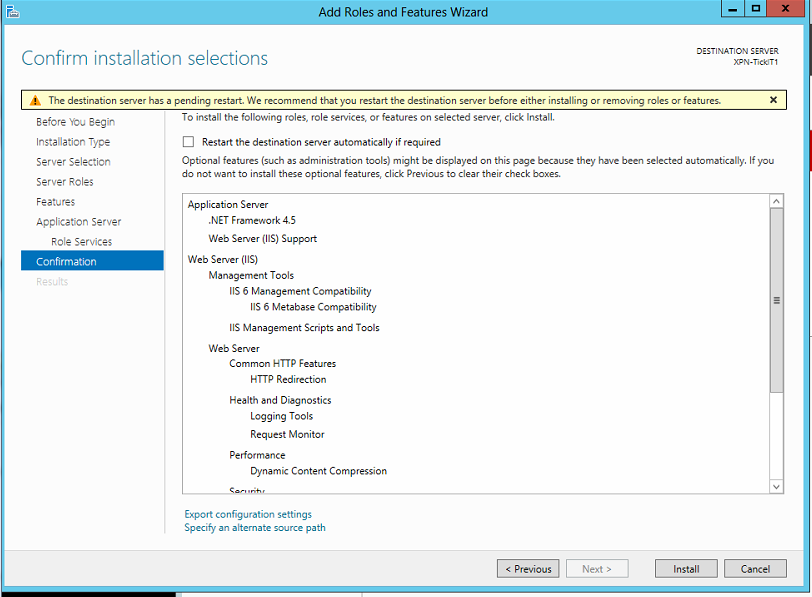
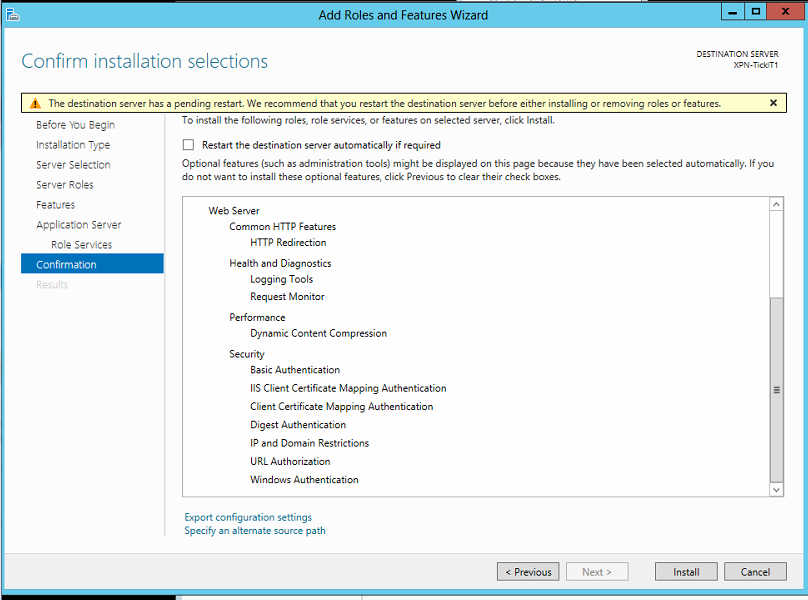
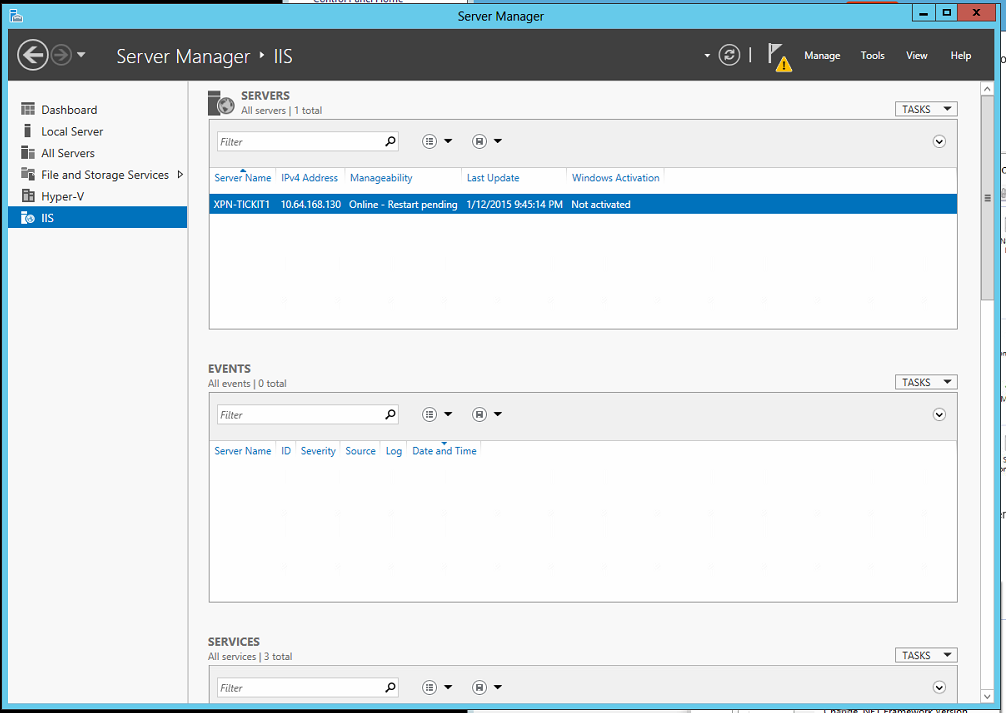
Step 1 & 2 - WINDOWS SERVER - Open Server Manager. Click on Local Server.
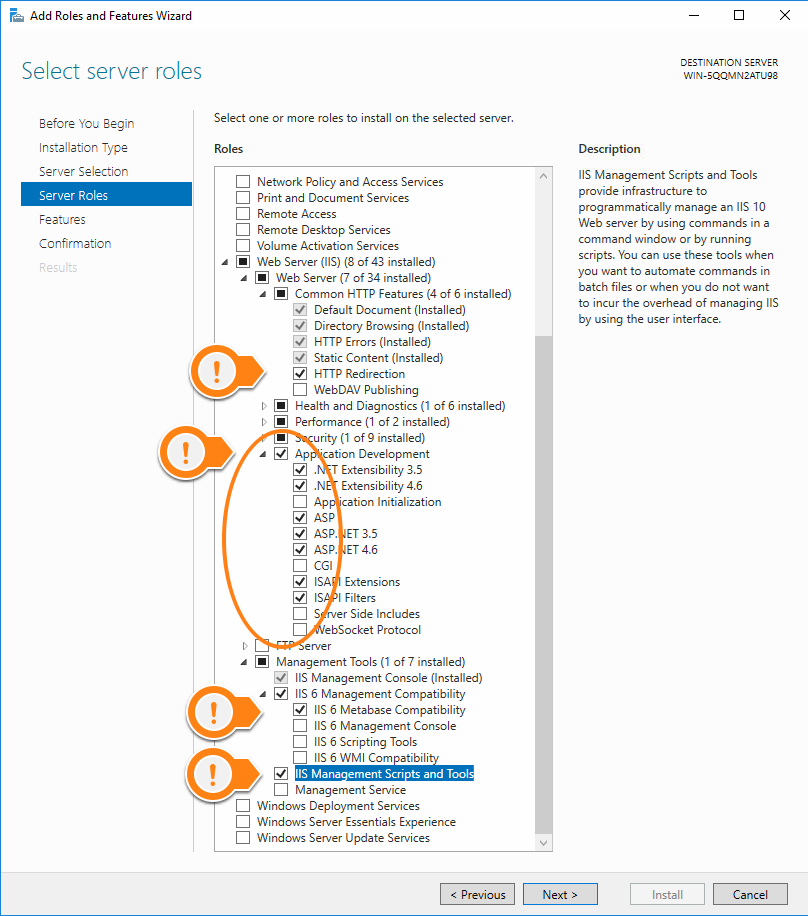
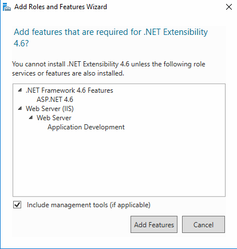
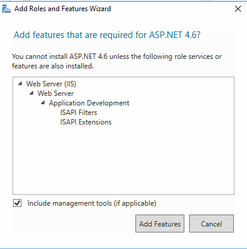
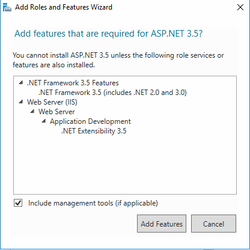
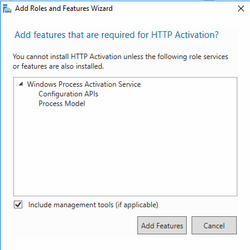
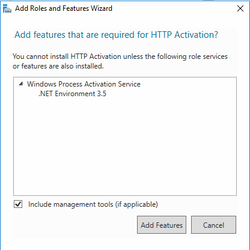
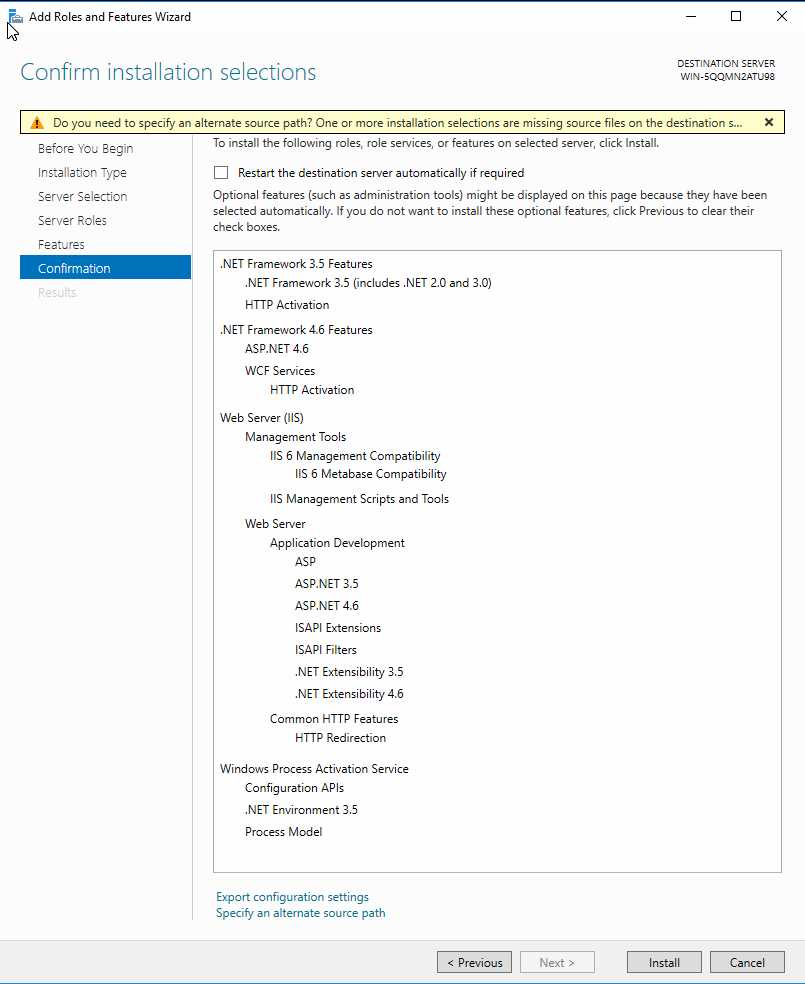
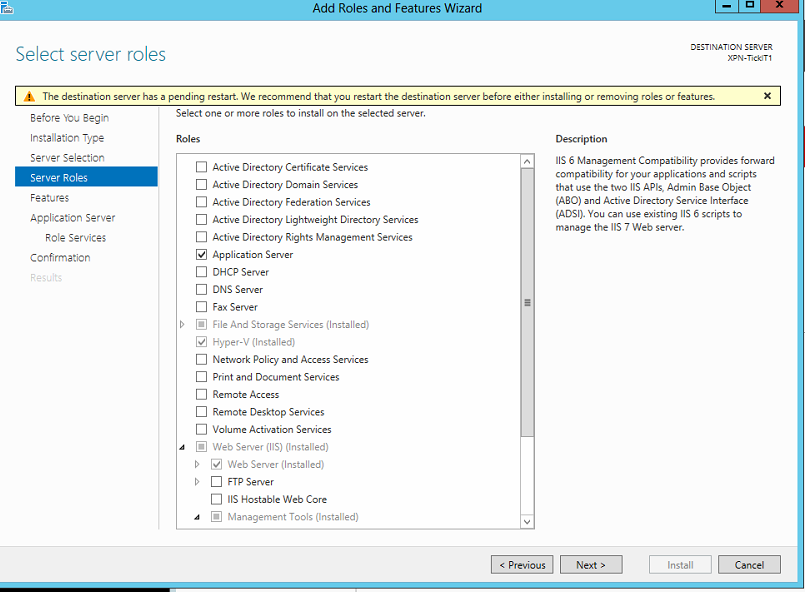
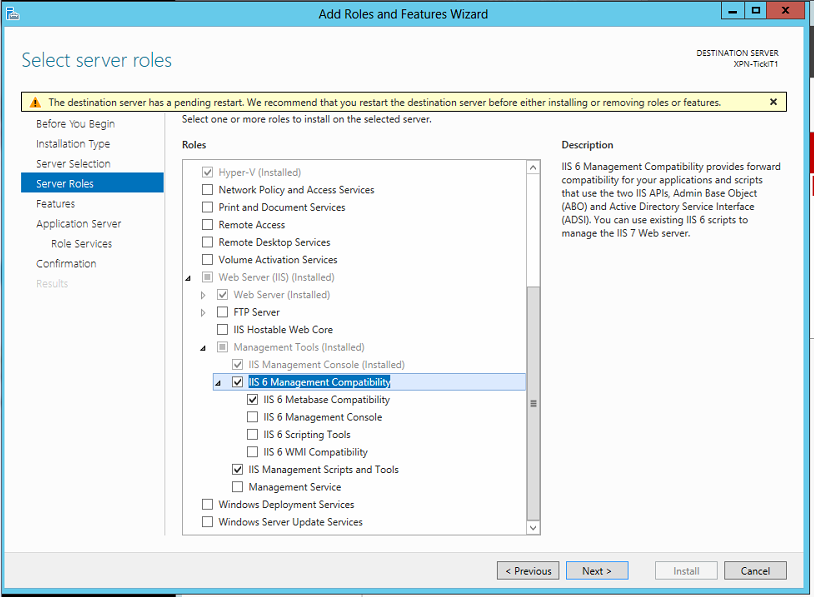
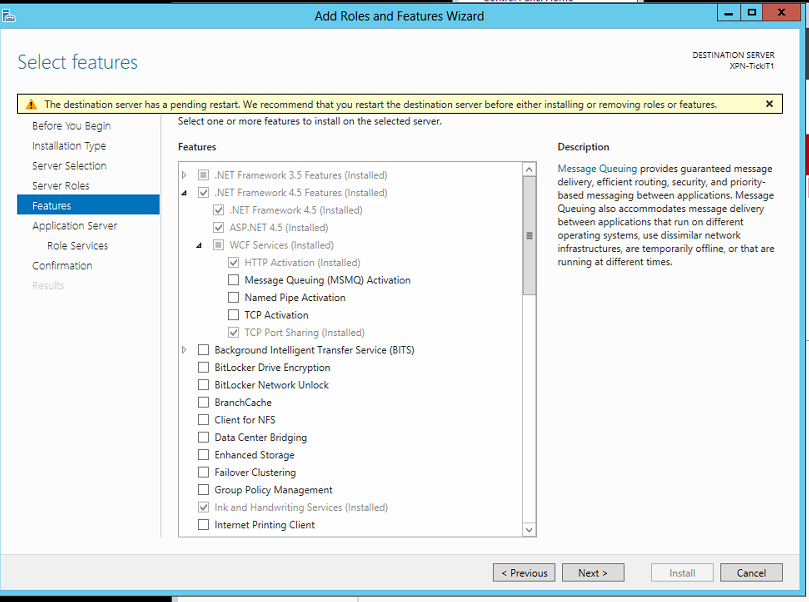
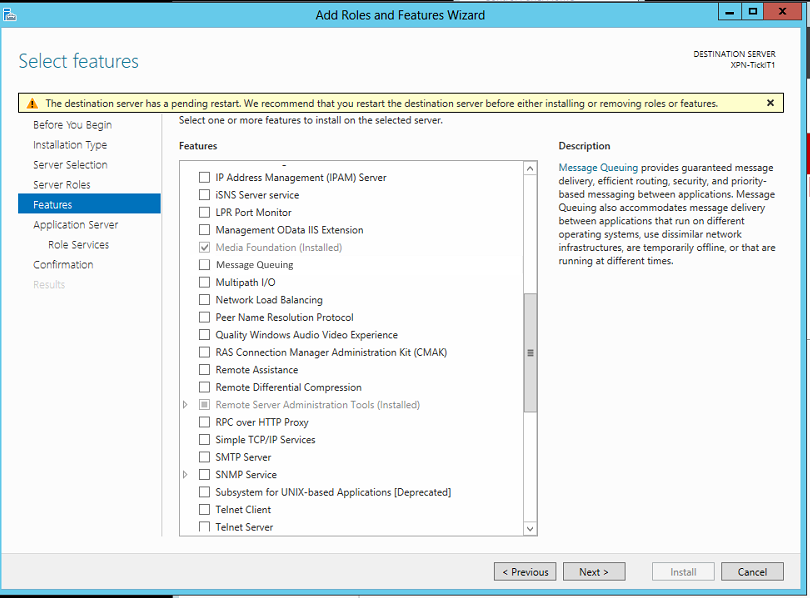
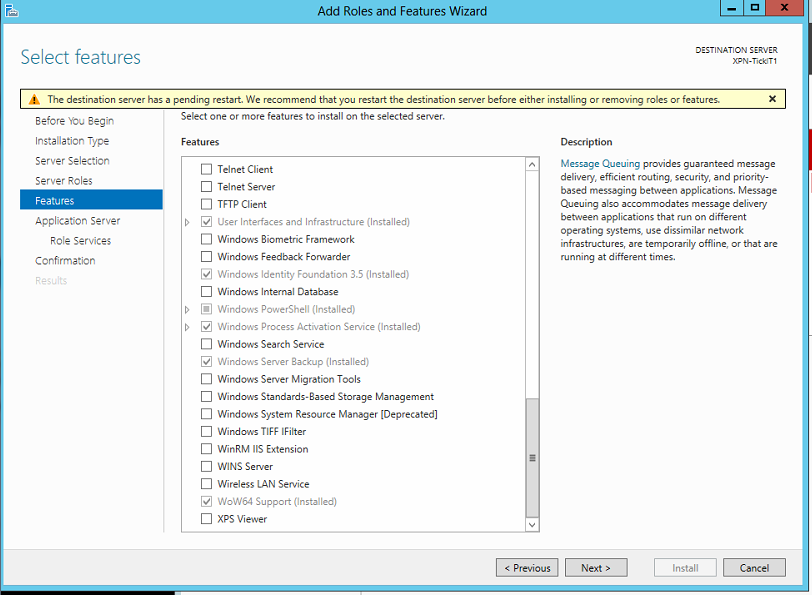
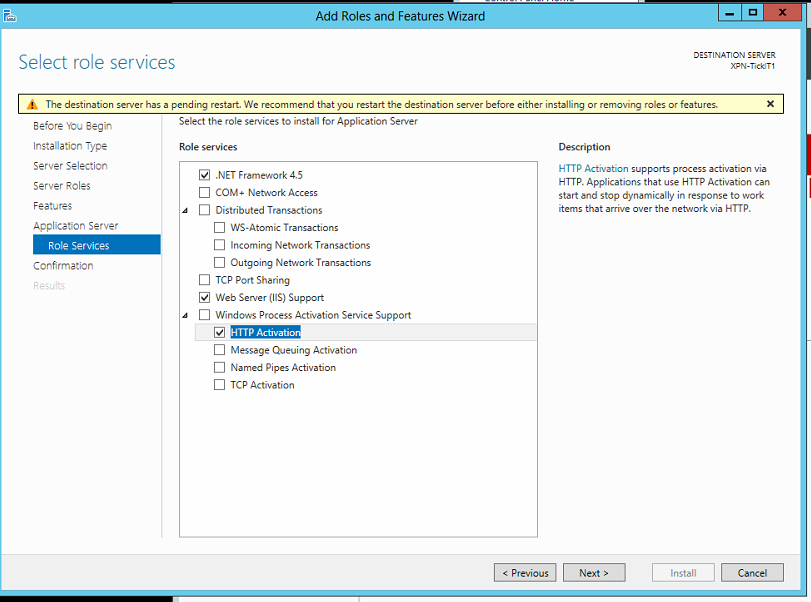
Step 3 - Ensure the following marked options are enabled or Roles and Features are enabled
Step 4 - Click OK
Configuring IIS
Step 1 - In the Control Panel, open the Administrative Tools
Step 2 - Open the IIS Management Control
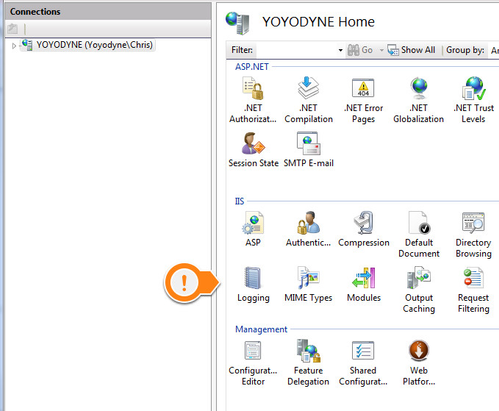
Step 3 - Click on the top node
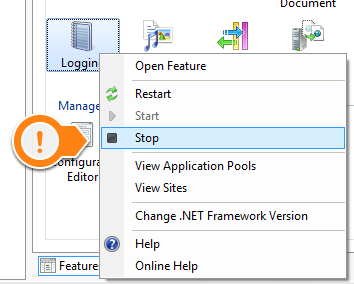
Step 4 - Right click on logging for IIS
Step 5 - Disable this as it is not needed for internal systems.
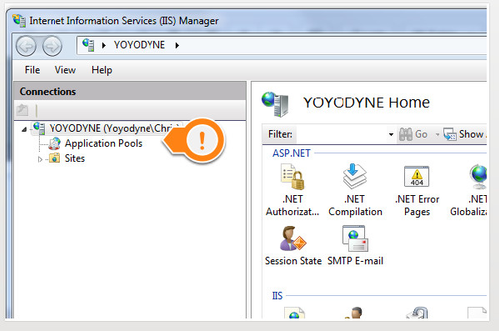
Step 6 - Expand the top node
Step 7 - Click on the Application Pools node
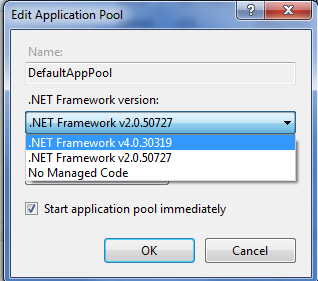
Step 8 - Find the DefaultAppPool
Step 9 - Double click on this and set the .NET Framework to v4.0.xxxxx
Step 10 - Click [OK]
Note
If you have more than 1 product installed on the same system (ie. Brando, Super Ticker, Chameleon, etc.), it is a good idea to create an Application Pool for each application.
Your IIS is now configured and you are ready to continue with installation of your product.
Step 11
You may also need to enable/start the World Wide Web Publishing service on the server before the site will be accessible.


