BL ACE (Assisted Creation Engine) is a tool for the Ross Video XPression graphic platform. ACE is a project validation step executed prior to broadcast by designers to design scenes with appropriate resource tags. ACE inspects the project scenes for common scene issues, maps supported resource tags to Super Ticker, and enables designers to correct scene mismatches or missing tags as needed. ACE is tightly integrated with XPression Studio; when you make resource tag adjustments in ACE, as you save your changes, they are automatically applied to the XPression project. When you make graphics package changes in XPression, just reload the project in ACE to see the latest information. ACE offers your designers the following powerful features: - Smart zones - ACE knows topic types for zones based on the resource tags assigned; zones appear and disappear as content becomes available
- Promotion management support
- Text formatting - metadata support, such as weather value degree symbol
- Animation options support - in, out, loop, update, subtopic change, more data, next page, and more
Workflow OverviewDesigners use XPression to create projects containing scenes. Each scene name identifies its type as well as object details for those regions where content needs to play out during broadcast. Each object in a scene can include resource tag object names that define where and how Super Ticker topics and content are dynamically populated. Super Ticker supports a number of resource tags using a specific naming convention syntax, and each one is preceded by a caret (^). When the project work in XPression is complete, designers can run ACE as a pre-broadcast validation step to check the project scenes for type, and map resource tags to Super Ticker supported tags. ACE helps designers ensure that scenes are correctly defined for the topic type they want to output, and ACE is smart enough to recognize topic types based on existing resource tags, as each scene must have at least one topic-dependent tag to support that topic. The ACE scene inspector identifies issues in the scenes. Because ACE is tightly integrated with XPression Studio, any scene adjustments you make in ACE are automatically applied to the original XPression project. When your scenes are ready to be published, you can push the entire project and all resources to Flow where you can use the project to create shows and rundowns. Validate a Project Using ACE- Access ACE and load an XPression project. See Getting Started with ACE below.
- Configure the ACE Scene Inspector (optional)
- Manage scenes and zones.
- Manage and assign resource tags for objects.
- Publish the project to Flow.
ACE Scene Inspector| Anchor |
|---|
| SceneInspector |
|---|
| SceneInspector |
|---|
|
The ACE Scene Inspector helps designers looks for common issues in scenes, such as subtle differences between animation keyframes like the first frame of ^In needing to match the first frame of ^Loop, or the differences between version A and version B of objects that are updated. The ACE Scene Inspector can help designers eliminate "pops" in the graphics when output.You can configure the ACE Scene Inspector to validate, and then identify and warn or ignore a variety of attributes including: - Object Position - the x, y, z co-ordinates of an object
- Object Rotation - the x, y, z rotation of an object
- Object Scale - the x, y, z scale multiplier of an object
- Object Texture Position - the x, y texture co-ordinates that handle the position of a texture on an object
- Object Alpha - the transparency of an object
- Text Properties - appearance attributes, such as auto-squeeze, word wrap, font, and so on of text objects
- Object Size - width/weight of quad objects
Select Window > Scene Inspector Settings to configure validation for these attributes.The changes you make are saved in ACE and available to every time you return. | Expand |
|---|
| title | Click here to see an example of the screen. |
|---|
| 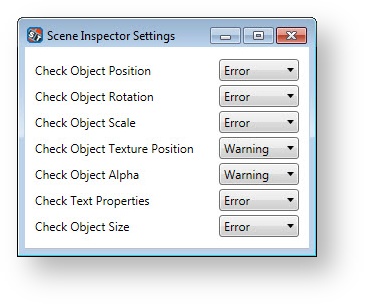 Image Modified Image Modified
|
| Info |
|---|
As a general guideline, configure the ACE Scene Inspector for each option as follows: - Ignore - not concerned about Scene Inspector results for this attribute
- Warning - an issue with this attribute should be reviewed before broadcast
- Error - an issue with this attribute will definitely cause an issue and should be fixed prior to broadcast
|
Scene and Zone Management| Anchor |
|---|
| SceneZoneMgmt |
|---|
| SceneZoneMgmt |
|---|
|
You can manage scene and zone information inline for the current project.
| Action | Details |
|---|
| View Scene Preview | When you click on a scene from the list, you can review a preview thumbnail of that scene. 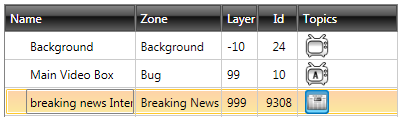 Image Modified Image Modified  Image Modified Image Modified
| | Modify Scene or Zone Information | - Click in the scene Name or the Zone identifier field to change it.
- Click away or press the ENTER key to apply your changes.
- Save your changes in the XPression project by clicking File > Save Selected Project.
 Image Modified Image Modified
| | Modify Layer Values | Each scene should have a unique layer value, except bugs which are mutually exclusive but can be unique as well. Layer values can can be positive or negative, and should be large enough values, relative to the number of scenes in the project, to keep scene layers properly organized. Scenes with higher layer values appear on top of scenes with lower layer values. If two scenes have the same layer value, they can not be on air at the same time, and showing one instantly removes the other, so you cannot animate between them. - Click in the Layer field to change it.
- Click away or press the ENTER key to apply your changes.
- Save your changes in ACE by clicking File > Save Selected Project, which also saves the value as the Default Take Item Layer value in the XPression scene (scene > Take Item tab > Default Take Item Options).
 Image Modified Image Modified
| | Review ID and Topic Type | ID is the scene identifier assigned in XPression. If you change the scene ID in XPression, refresh the project in ACE by pressing the F5 key or selecting View > Refresh to see the latest data. ACE identifies the Topic Type based on the resource tags assigned to objects. For example, if you have an object called ^Story, that scene includes Story support. When you change the object to a different topic type, such as ^Temp, and apply your changes, the scene supports Weather instead. | | Review Layers Count | The Layers value displays the number of layer objects in the scene, and the value is relative to the number of scenes on air at the same time. Because each layer in a scene is rendered separately by XPression, and then composited together, a Layers value over 10 could potentially result in poor output performance. | | Review Scene Inspector Results | After configuring the ACE Scene Inspector, return to ACE and refresh the project by pressing the F5 key or selecting View > Refresh. Scene Inspection results display in the far right column, as follows:  Image Modified Error detected; review before broadcast Image Modified Error detected; review before broadcast
 Image Modified Warning detected; fix before broadcast Image Modified Warning detected; fix before broadcast
Hover over the icons to see details. 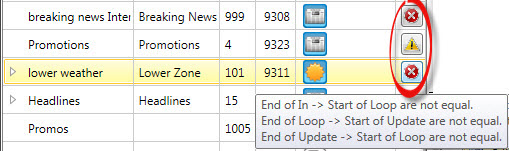 Image Modified Image Modified
Click on the icon to look at the warning or error in more depth. Switch to the XPression instance to adjust project attributes as needed and save those changes. Return to ACE and click Refresh to show the latest data from XPression. | Expand |
|---|
| title | Click here to see an example of the screen. |
|---|
|  Image Modified Image Modified
| Info |
|---|
If your XPression instance isn't currently available, in ACE, select View > XPression UI to make it available to you. |
|
| | Sort Table | You can sort the table by Name, Zone, Layer, or ID. Click on a column heading to sort in ascending or descending order. | | Expand Scenes | Rolls and crawls that consist of multiple scenes can be expanded in the list. 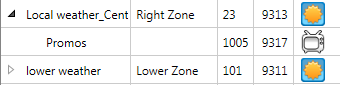 Image Modified Image Modified
Promo scenes and child scenes are also shown as children. See Promotion Management for details. - Promo scenes are of the format: SceneName [ParentName], and promo scenes contain a ^Promo animation or demo.
- Child scenes are of the format: SceneName {ParentName}. Child scenes are simply other scenes that go on/off air with the parent where the animations run simultaneously to move some additional functionality to a different scene to simplify masking, animations, or other complex effects.
|
Resource Tag Management| Anchor |
|---|
| ResourceTagMgmt |
|---|
| ResourceTagMgmt |
|---|
|
| Action | Details |
|---|
| Filter Resource Tag List | By default, ACE shows you all tags defined for the scene. You can filter which resource tags you see in the list by selecting or clearing each option, as follows: - Text Objects
- Textured Objects
- Animations
- Non Super Ticker Objects - resource tags that do not start with a caret (^)
 Image Modified Image Modified
| | Modify Resource Tags | You can manage resource tag information inline for objects defined in the current project, including Name, Variation, Index, and Version B. - Click in the Name field and select a Super Ticker resource tag, or enter other tag text, as specified below.
 Image Modified Image Modified - Click away to continue. The object turns red to indicate that a change has been made but not yet applied.
 Image Modified Image Modified - Click Apply Changes to save your changes. Your changes are saved back to the XPression project as well.
| Info |
|---|
The Super Ticker tags available in the list are based on the topic type for the scene. You can choose a different Current Topic to change the tags available in the list. If you change the topic type to access other tags, the Super Ticker Tag Descriptions list to the right also changes. |
Resource tag names are of the format: ^Root[Option](Variation)IndexB, where: - Root is the base name of the object, like Story, Temp, City, and so on.
- Option is an attribute of the root object used for organization. For example: Home[Score] and Home[Logo] for scores.
- Variation is only used as a formatter. For example: ^Time(h:mm:ss), ^Date(MMMM D), ^StartTime(h:mm) formats are passed directly to Mircosoft® Windows®. Supported Microsoft values can be found online.
- Index is used when you need to read multiple records at once. For example, to display multiple temperatures, stocks, or scores on a single page, each record needs an index value. In a weather example, ^City/^Temp, ^City2/^Temp2, ^City3/^Temp3 would show you the current temperatures for three (3) cities at a time.
- Ver B - indicates the version B of the object, which should only be visible during an ^Update animation. In XPression, data is updated by: setting B to the new value, running ^Update animation which hides version A and shows version B, then updating A (now offscreen) and starting the ^Loop animation, which snaps A on and B off.
| | Sort Table | You can sort the table by tag type (icons), Variation, or Index. Click on a column heading to sort in ascending or descending order. | | Super Ticker Tag Descriptions | | Anchor |
|---|
| STResourceTagRef |
|---|
| STResourceTagRef |
|---|
|
The far right pane of ACE dynamically updates to show you relevant Super Ticker Tag Descriptions available and for the current topic type.
To review Super Ticker Tag Descriptions available for a different topic type, select a different Current Topic type from the list. 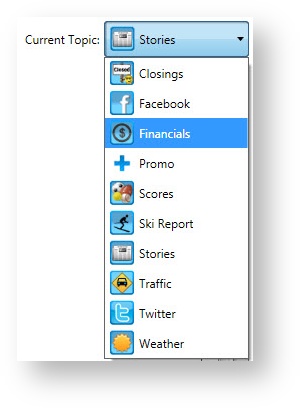 Image Modified Image Modified  Image Modified Image Modified
| | Revert Changes | To revert all changes made in ACE, click Revert Changes. ACE will revert all changes made for that scene and re-read scene data from XPression. |
- Click Window > Promo Manager.
- Click on an Object name to modify it which also modifies the resource tag.
- Click on a Spot ID to modify it. Spot IDs must correspond to promo assignments in Flow using the Promos module in order to display promos in specific scenes.
- Click OK to save your changes to the XPression project.
| Expand |
|---|
| title | Click here to see an example of the screen. |
|---|
| 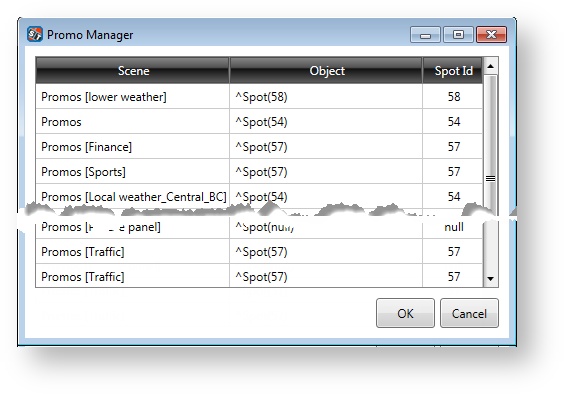 Image Modified Image Modified
|
Publish the Project to FlowWhen your scenes are ready to be published, you can push all of the information about the project to Flow, including zone names, scene names, topic support, and so on. The project itself is not published. In Flow, you can use the project to create shows and rundowns.- Click Publish > Publish to Flow.
- Specify a Project Name, Project Details, and Published By details. This information will be visible in Flow.
- Click Publish to push the entire project to the Super Ticker Flow database. The project is now available in Super Ticker Flow.
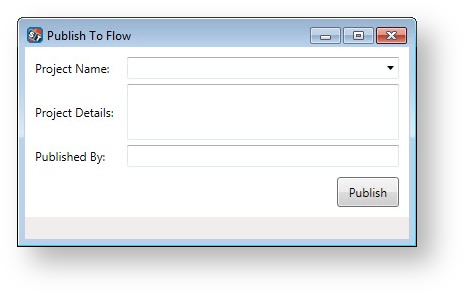 Image Modified Image Modified
Manage ProjectsPeriodically, you may need to delete projects from the Super Ticker Flow database, and you can do so using ACE.- Click Publish > Manage Projects.
- Select a project in the Projects List. You can review additional project information for the selected project, including zones, scenes, and rundown sets before choosing to delete a project.
- Press the DELETE key.
- Click Apply to remove those projects from the database.
| Expand |
|---|
| title | Click here to see an example of the screen. |
|---|
| 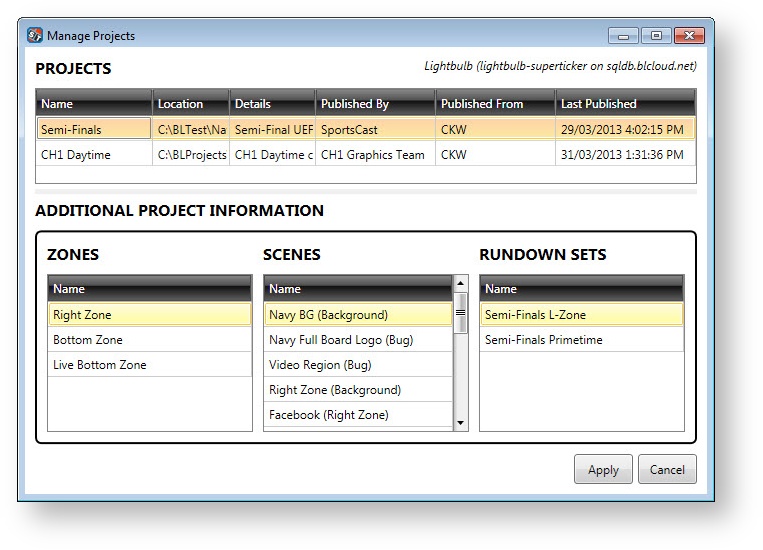 Image Modified Image Modified
|
Manage Database ConnectionACE must be configured to connect to your Super Ticker database. Database connection and user authentication values would have been correctly configured by your system administrator initially during installation. ACE can store connection values for more than one server, if needed.| Note |
|---|
It is recommended that you contact Bannister Lake Support for assistance when creating a new database connection or when modifying existing database values. |
- Select Edit > Preferences.
- Click New to configure a new database connection, or modify existing connection values as needed. Click Test to test the connection between ACE and the Super Ticker database.
- After making ACE database configuration changes, click OK.
| Expand |
|---|
| title | Click here to see an example of the screen. |
|---|
| 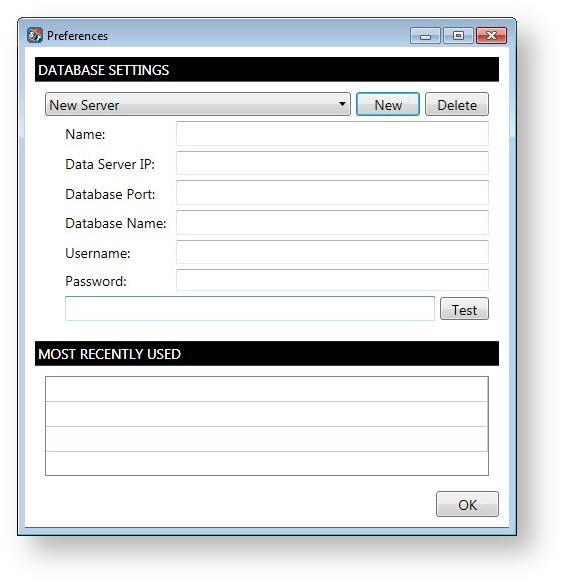 Image Modified Image Modified
|
|