From Photoshop/After Effects to XPR
Xpression supports a variety of graphic file formats
Static Graphics
Almost all static file formats are supported. With or without alpha. It is recommended that the images are cropped to size, instead of full screen resolution.
Order | Format | Description |
|---|---|---|
1 | PNG | Most recommended for static graphics. Efficient file size, with straight matte alpha. |
2 | Jpg | Use if no alpha is required due to its smaller file size. |
3 | Tiff, Targa | Useful if you want to utilize the metadata inside the image. |
4 | PSD | Photoshop Format in which you can import all layer separately as quads. |
| 5 | Gif | |
| 6 | BMP |
Animated/Video graphics
While Xpression supports MOV, MP4, MPG, it is recommended that you use the native Xpression AVI codec for your video animations. It is also recommended that all video files be rendered Crop to Fit as rendering full resolution will decrease resources in Xpression.
| Order | Format | Description |
|---|---|---|
| 1 | AVI | Recommended for animations. Using the xpression video codec. |
| 2 | MPEG | Support only with 32bit versions of Xpression |
| 3 | Quicktime | Support only with 32bit versions of Xpression |
| 4 | Sequential Images | *While not necessary, sequences should be converted to avi video format for optimal results. |
3D Object Formats
These are the supported 3D Formats
| Order | Format | Description |
|---|---|---|
| 1 | 3DS | 3D Studio Format |
| 2 | OBJ | Open Object Format |
| 3 | FBX | |
| 4 | C4D | Cinema4D format |
Render animations directly from After Effects:
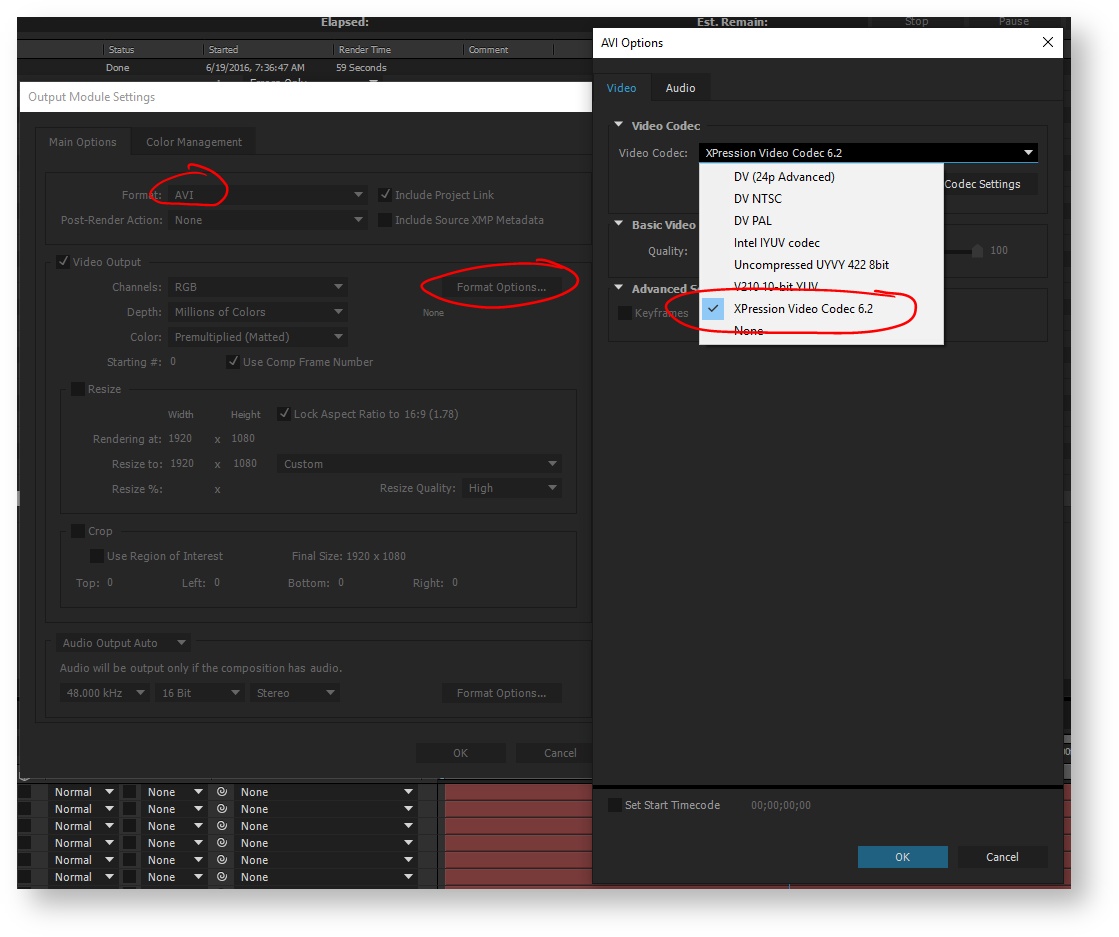
- Install the Xpression AVI Codec
- Build your scene in After Effects
- Render using the Xpression AVI Codec
Render your animation using the Xpression Video Coder (for MAC users)
- Render your Animation in After Effects (Recommend Quicktime Animation with Alpha)
- On your Xpression system, open the Xpression Video Coder (or install the Video Coder on your GFX system for (PC only))

- Import your animation by selecting "New Job"

- Go over your settings. Match your settings to your project settings
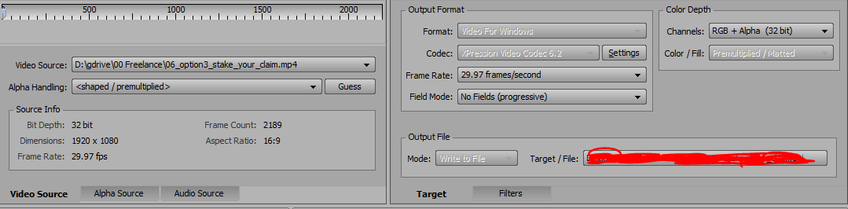
- Press To Render Queue or Render All

3D in Xpression
You can import 3DS and OBJ files inside xpression.
- You're not limited to the quantity of vertices inside your 3D models, but the more vertices you generate, the slower the system will become.
- Try creating your scenes in an efficient manner.
- Utilize the Null objects in Cinema 4D or the groups in 3DS Max to organize your objects.
- Properly map your materials prior to exporting from your 3D application.
- In Xpression you can assign your maps/materials to your object including textures, reflections and refractions.
Xpression Best Practices
Creating Scenes in Xpression
Always assume your producers will change their mind.
- It is recommended that you use Xpression's Groups often.
- Create these groups initially to assist with object coordinates.
- Label your objects clearly as it will become important the larger your scenes get.
- If you add a number at the end of your object, sequential numbers will be added as you copy and paste them. The same goes with copying Animation Controllers.
- Animate your groups and not your objects. (similar to how you would animate a nested comp in After Effects)
An example of a recommended workflow tree: 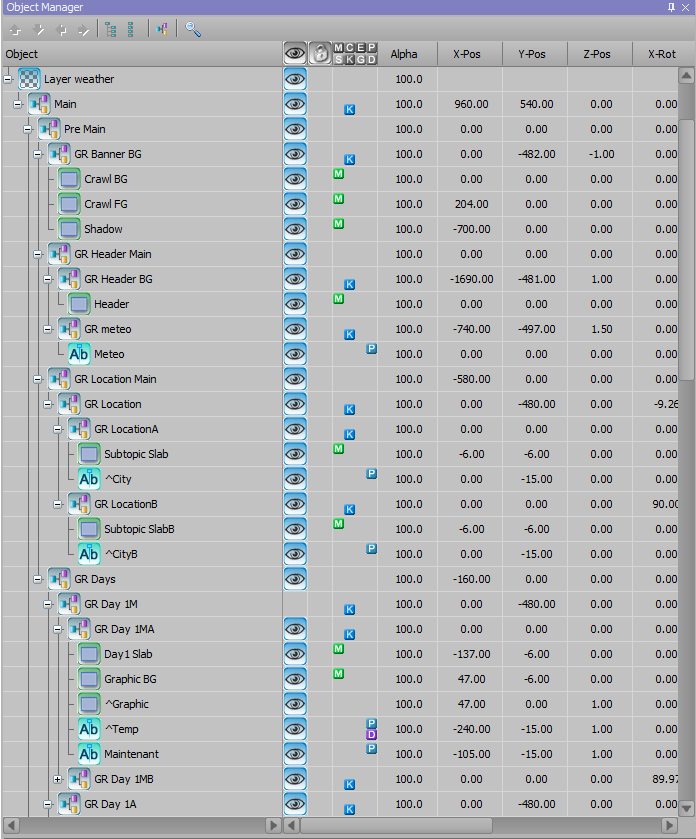
Animating Inside Xpression
While After Effects can create wonderful graphics, it does require rendering every time you want to output. The advantage of using Xpression as your animation tool, is that things can be modified instantly with no rendering required. When conceptualizing your scenes, always plan ahead considering what Xpression has to offer in terms of animation tools.
- Basic Position, Rotation, Scale and Texture Position can all be animated inside Xpression.
- Persistent loops for backgrounds can be created using the Continuous Animation Tool.
- You can create unlimited scene directors which could in turn be triggered using "scene triggers" This is similar to using multiple nested comps running at the same time.