Text Objects and Fonts
|
|
|---|
| Text | If an object doesn't have a tag assigned, you can place text here. This is also the text that appears in Chameleon Designer, even if a tag is assigned. | | Font | The selected font (see details below) | | Format | Used to format time dates, times and dates numbers as specified here. | | All Caps | Optionally sets text to be All Caps | | Alignment | Left, Center or Right alignment | | Word Wrap | If selected, text will wrap at the specified number of pixels | | Maximum Width | If the text is wider than Maximum Width after Word Wrap is applied, it will be "squeezed" in width, but not to less than the Minimum Scale Width. For example, suppose Word Wrap is 800, Maximum Width is 600 and Minimum Scale Width is 0.75. After Word Wrap is applied, if the text is wider than 600 it will be scaled down, but not below 75% of its original size. | | Minimum Scale Width | This number needs to be less than 1.00 in order for the auto-squeeze (Maximum Width) to work as described above. | | Maximum Height | Height of the text box. Good for creating maximum height paragraphs. | | Minimum Scale Height | This number needs to be less than 1.00 in order for the auto-squeeze (Maximum Height) to work. Text will be reduced to Maximum Height, but not scaled to less than Minimum Scale Height. | | Padding | Blank space around the text, specified in pixels. This is useful for some cursive fonts that otherwise may be slightly truncated. | | Line Spacing | Blank space between lines, specified in pixels. | | Character Spacing | Blank space between characters, specified in pixels. |
Using Google FontsChameleon Designer supports Google fonts (see https://fonts.google.com). Simply type any Google font into the Family drop down: 
Using Local FontsChameleon Designer supports local fonts, which are defined by a font file (an otf, ttf, svg, woff or woff2 file). When using local font, a local font folder and css file will be created at the root of the projects directory determined in the Editor Settings: 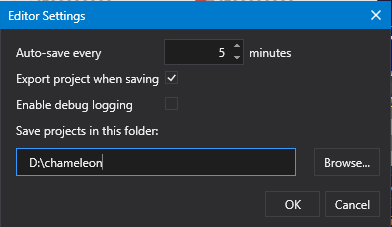
To define a local font, click Settings > Local Fonts, which displays this dialog: 
Click Add to add a new local font. Then you can specify the Family name and Category, and select a font file for every available style and weight combination: 
When local fonts are defined, the font files are copied to the Global Fonts folder. This folder must be available in the Player environment too. Local font definitions are not project specific. To make fonts available to your project, define them in the Fonts list, where they are organized by folders. The default and top-level folder is called Home. If you click Show Folders, folders will appear as a tree on the left. You can use drag-and-drop to rearrange folders or move a font to a new folder: 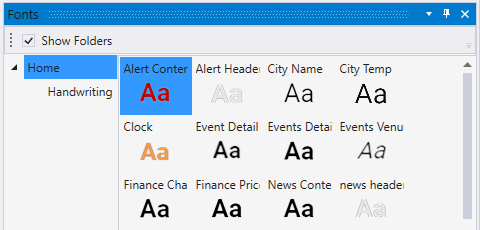 Image Added Image Added
To add a new folder, right-click and select Add Folder:  Image Removed Image Removed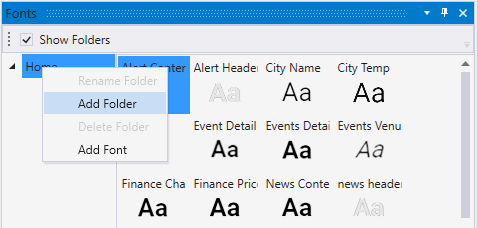 Image Added Image Added
You can right-click on the folder icon to rename or delete a font folder:  Image Removed Image Removed
Double-click on the folder to open it. 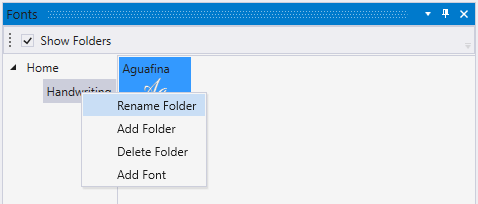 Image Added Image Added Click Add Font to create a new project font definition, where you will select either a Google or local font. You can also right-click a font definition and select Edit, Delete or Duplicate:  Image Removed Image Removed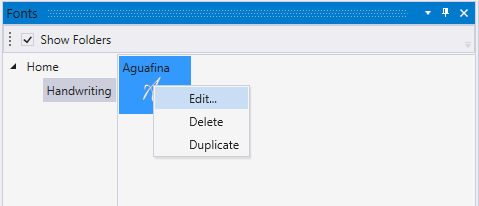 Image Added Image Added
Another way to edit a font is to select the pencil icon next to the font type in the text object properties: 
When you click Add Font or Edit, you are shown the Edit Font dialog, where you can select the desired Google or Local font and specify the properties: 
Finally, you can see which fonts are defined in the project but not used by selecting Reports Tools > Unused Fonts Report:  Image Removed Image Removed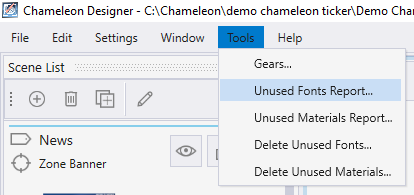 Image Added Image Added
You can delete unused fonts by selecting Tools > Delete Unused Fonts.
|