The following article will guide you through installing your BL web based content management software.
Installing Your Brando Web Based Content Management Software
Obtain the installer from the following location - http://bannisterlake.com/dl/installs/Brando/Flow/
The installer package will be named as follows - FlowForBrandoInstaller_6.X.XXXX.msi
Starting the Install
STEP 1 - Double click the MSI package to begin the installer.
| Info | ||
|---|---|---|
| ||
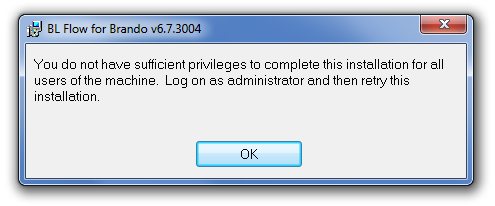
If you receive the message below, download the matching setup.exe. This additional installer component will assist in launching with elevated privilege levels. |
Step 2 - Proceed with the values provided by BL. The default install values are usually fine unless you have been setup with a non standard install. Be sure to set your MySQL password as was defined during the MySQL setup.
Step 3 - If this is your primary or first Brando server, leave this enabled.
| Warning | ||
|---|---|---|
| ||
When installing or updating a backup server with the Flow package you must un-check this box or you will need to re-synchronize your backup server database manually to resume synchronization. |
Step 4 - Unless specific changes have been made to your server, the default values for the Installation Address dialog are acceptable.
Step 5 - Proceed through the rest of installation clicking the Next buttons.
Step 6 - Continue through the steps until the installation is complete.
You have successfully installed Brando, Proceed to the final configuration steps.


